

Written by Will Duru, BSc (Hons) Sport and Exercise Science, Level 3 Personal Trainer
Building strength doesn’t require an expensive gym membership or fancy equipment. In fact, home workouts have surged in popularity in recent years – over 70% of fitness enthusiasts plan to continue exercising at home post-pandemic due to the convenience and time saved. With just your body weight and a bit of space, you can perform bodyweight strength training that delivers serious results. This guide covers the benefits of bodyweight exercise, key moves to get strong at home, progressions to keep challenging yourself, plus how the Just12Reps no-equipment workout app can create personalised routines to keep you on track.
Why Choose Bodyweight Workouts at Home?
Bodyweight exercises offer unique advantages that make them ideal for home strength training:
- Anytime, Anywhere Convenience: You can exercise in your living room, backyard, or hotel room – no gym needed. This makes it easy to fit workouts into a busy schedule.
- No Equipment Needed: The price is right because there’s nothing to buy – your body is the gym. Aside from a chair or sturdy surface for a few moves, you won’t need weights or machines
- Effective for Building Strength: Don’t underestimate bodyweight workouts – research shows they build muscle and strength “independent of an external load,” meaning you can get strong without lifting weights. In a 10-week study, participants improved their core endurance by 11% and lower-body power by 6% using only bodyweight routines
- Functional Fitness: Bodyweight movements are highly functional, engaging multiple muscles and joints together. This mimics everyday activities and improves balance and coordination better than isolated machine exercises. For example, a push-up works your chest, shoulders, arms and core all at once.
- Scalable for Any Level: Whether you’re a beginner or advanced, you can adjust the difficulty of each exercise. By changing your body angle, performing easier variations, or increasing the number of reps, bodyweight training adapts to your level and grows with you. We’ll discuss progressions for each exercise below.
Perhaps the biggest benefit is that bodyweight strength training removes most common excuses. You don’t need a gym or special gear, and you won’t be intimidated by others. All you must do is show up (at home) and move your body. Consistency is what yields results, and with smart programming, you can continually get stronger using just your body weight.
Progressive Overload: How to Get Stronger with Bodyweight Training
To build muscle and strength, progressive overload is key. This means consistently increasing the challenge on your muscles so they can adapt and grow. With weightlifting, you’d add more weight, but how do you progress using just bodyweight? Here are a few proven methods:
- Increase your repetitions: As an exercise becomes easier, do more reps to fatigue the muscles further. For example, if you can comfortably do 12 push-ups, aim for 15 on your next session.
- Reduce rest times: Shorter rest times between sets force your muscles to work harder and build endurance.
- Use harder variations: Progress to more challenging exercise versions (explained below) – for instance, elevate your feet to make a push-up more difficult, or transition from two-leg squats to single-leg variants.
- Slow down the tempo: Performing reps more slowly increases “time under tension,” making your muscles work longer per rep. Try a 3-second lowering phase on squats or push-ups to feel the burn.
By applying these strategies, bodyweight exercises can effectively build muscle mass and strength. As one expert puts it: “Bodyweight exercises can build muscle mass, as long as you do progressive overload”. The bottom line: challenge yourself a bit more each workout – whether by extra reps or a tougher variation – and your muscles will respond by getting stronger.
The Best Bodyweight Exercises for Building Strength at Home
Ready to train? Below are some of the most effective bodyweight exercises for a full-body strength training routine. These exercises target all major muscle groups and require minimal to no equipment. For each exercise, we include tips on proper form, muscles worked, and how to modify the difficulty (easier or harder) as you progress.
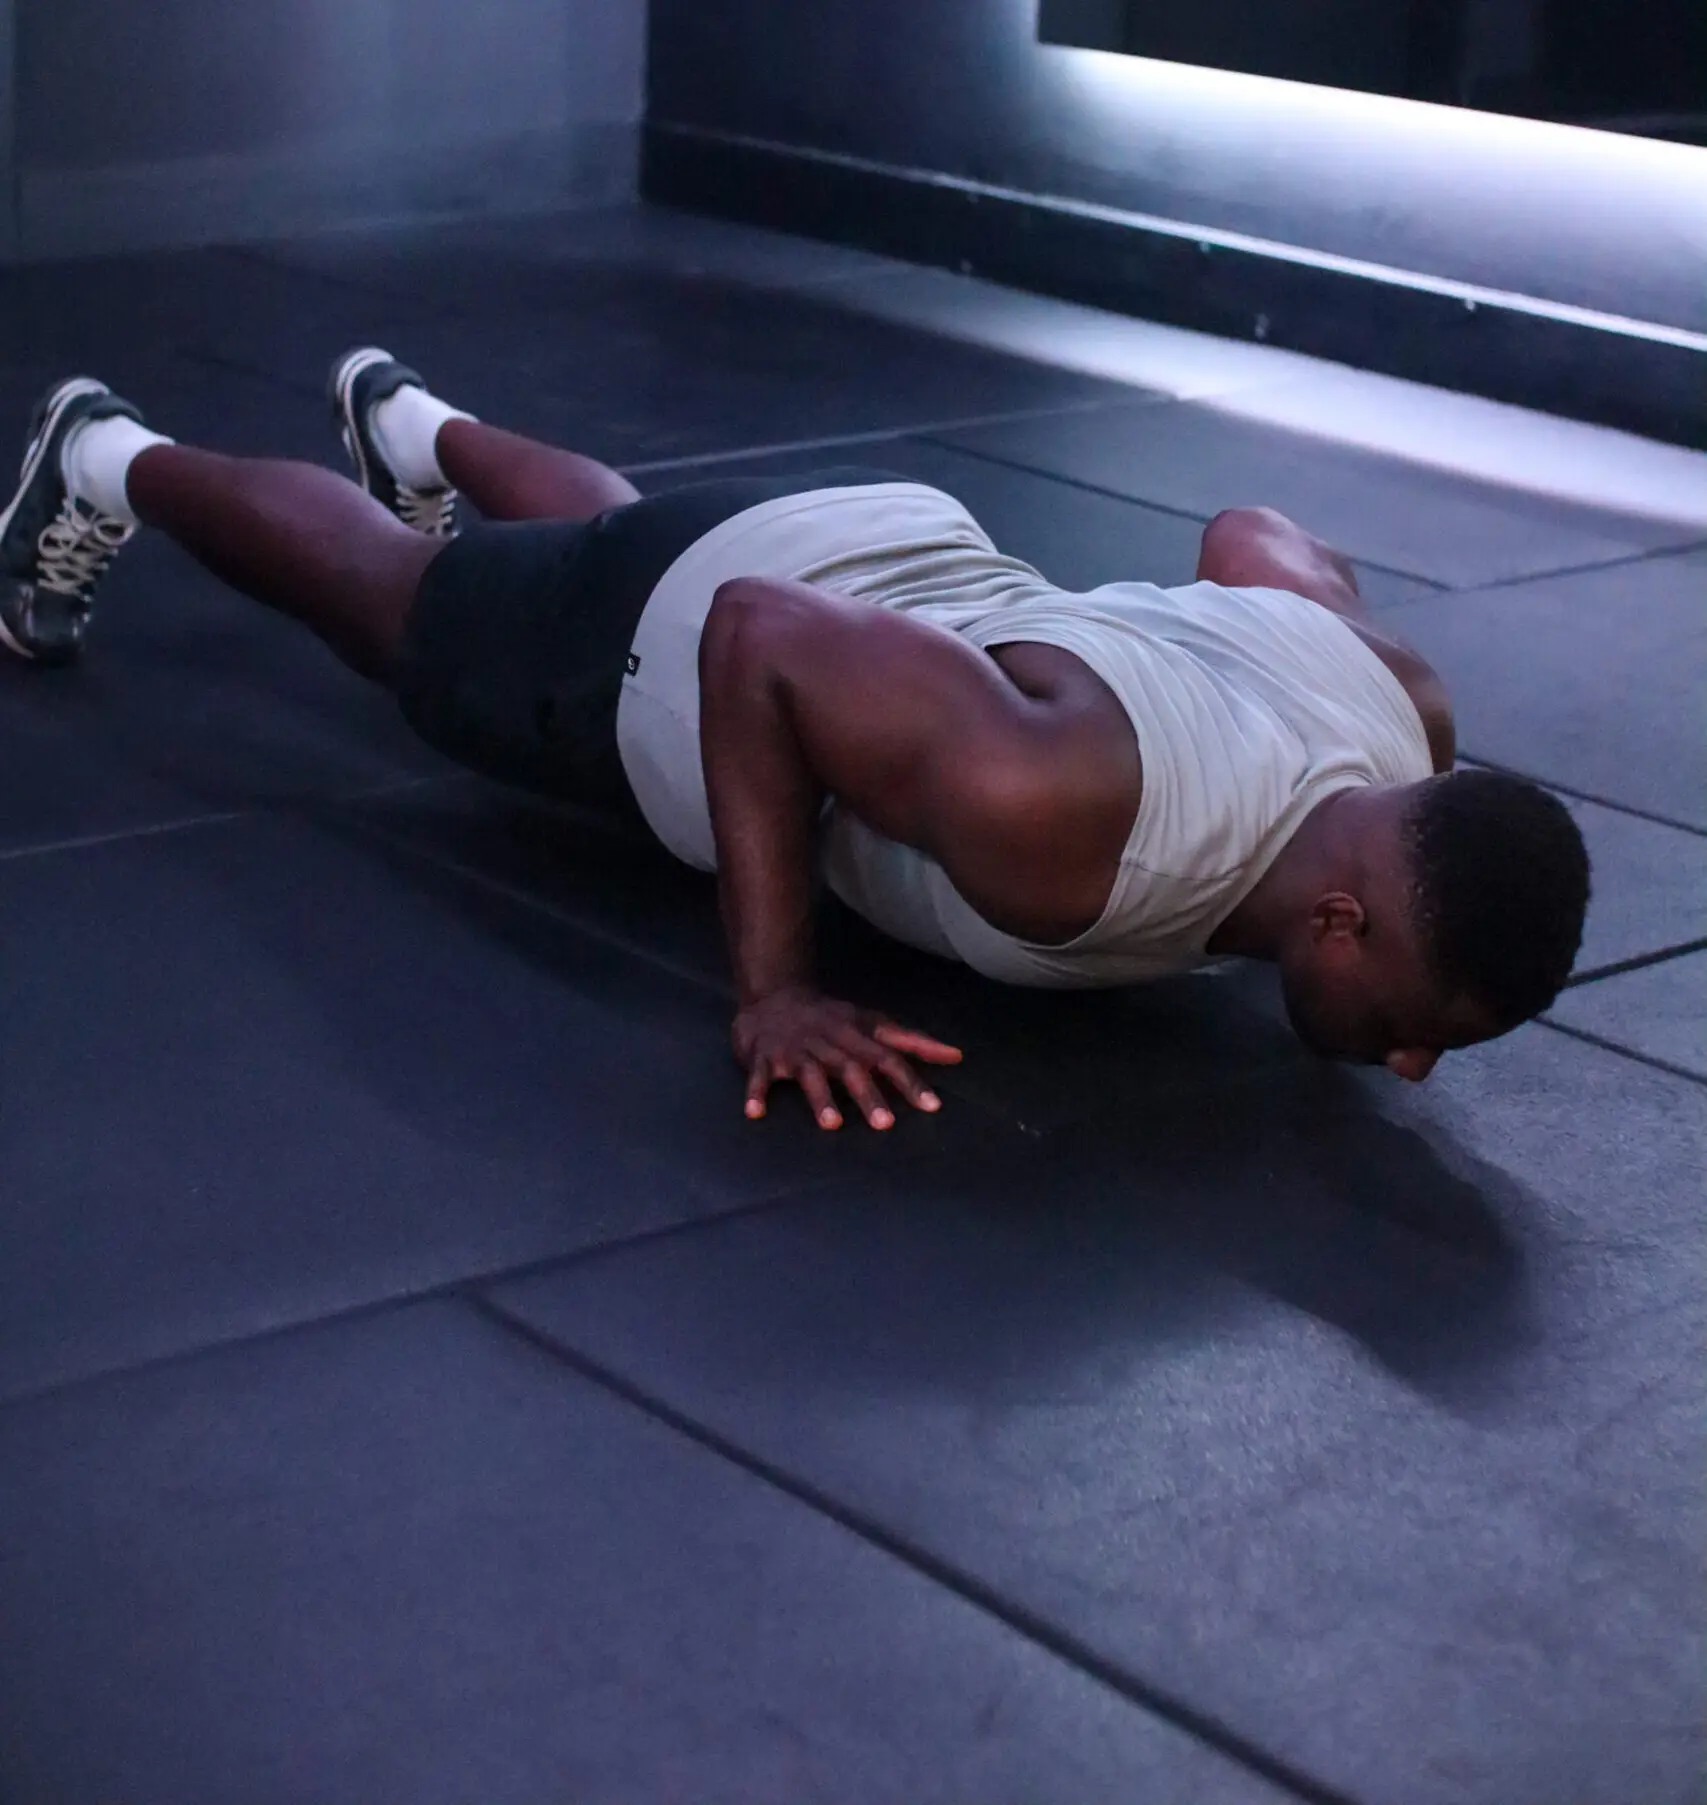
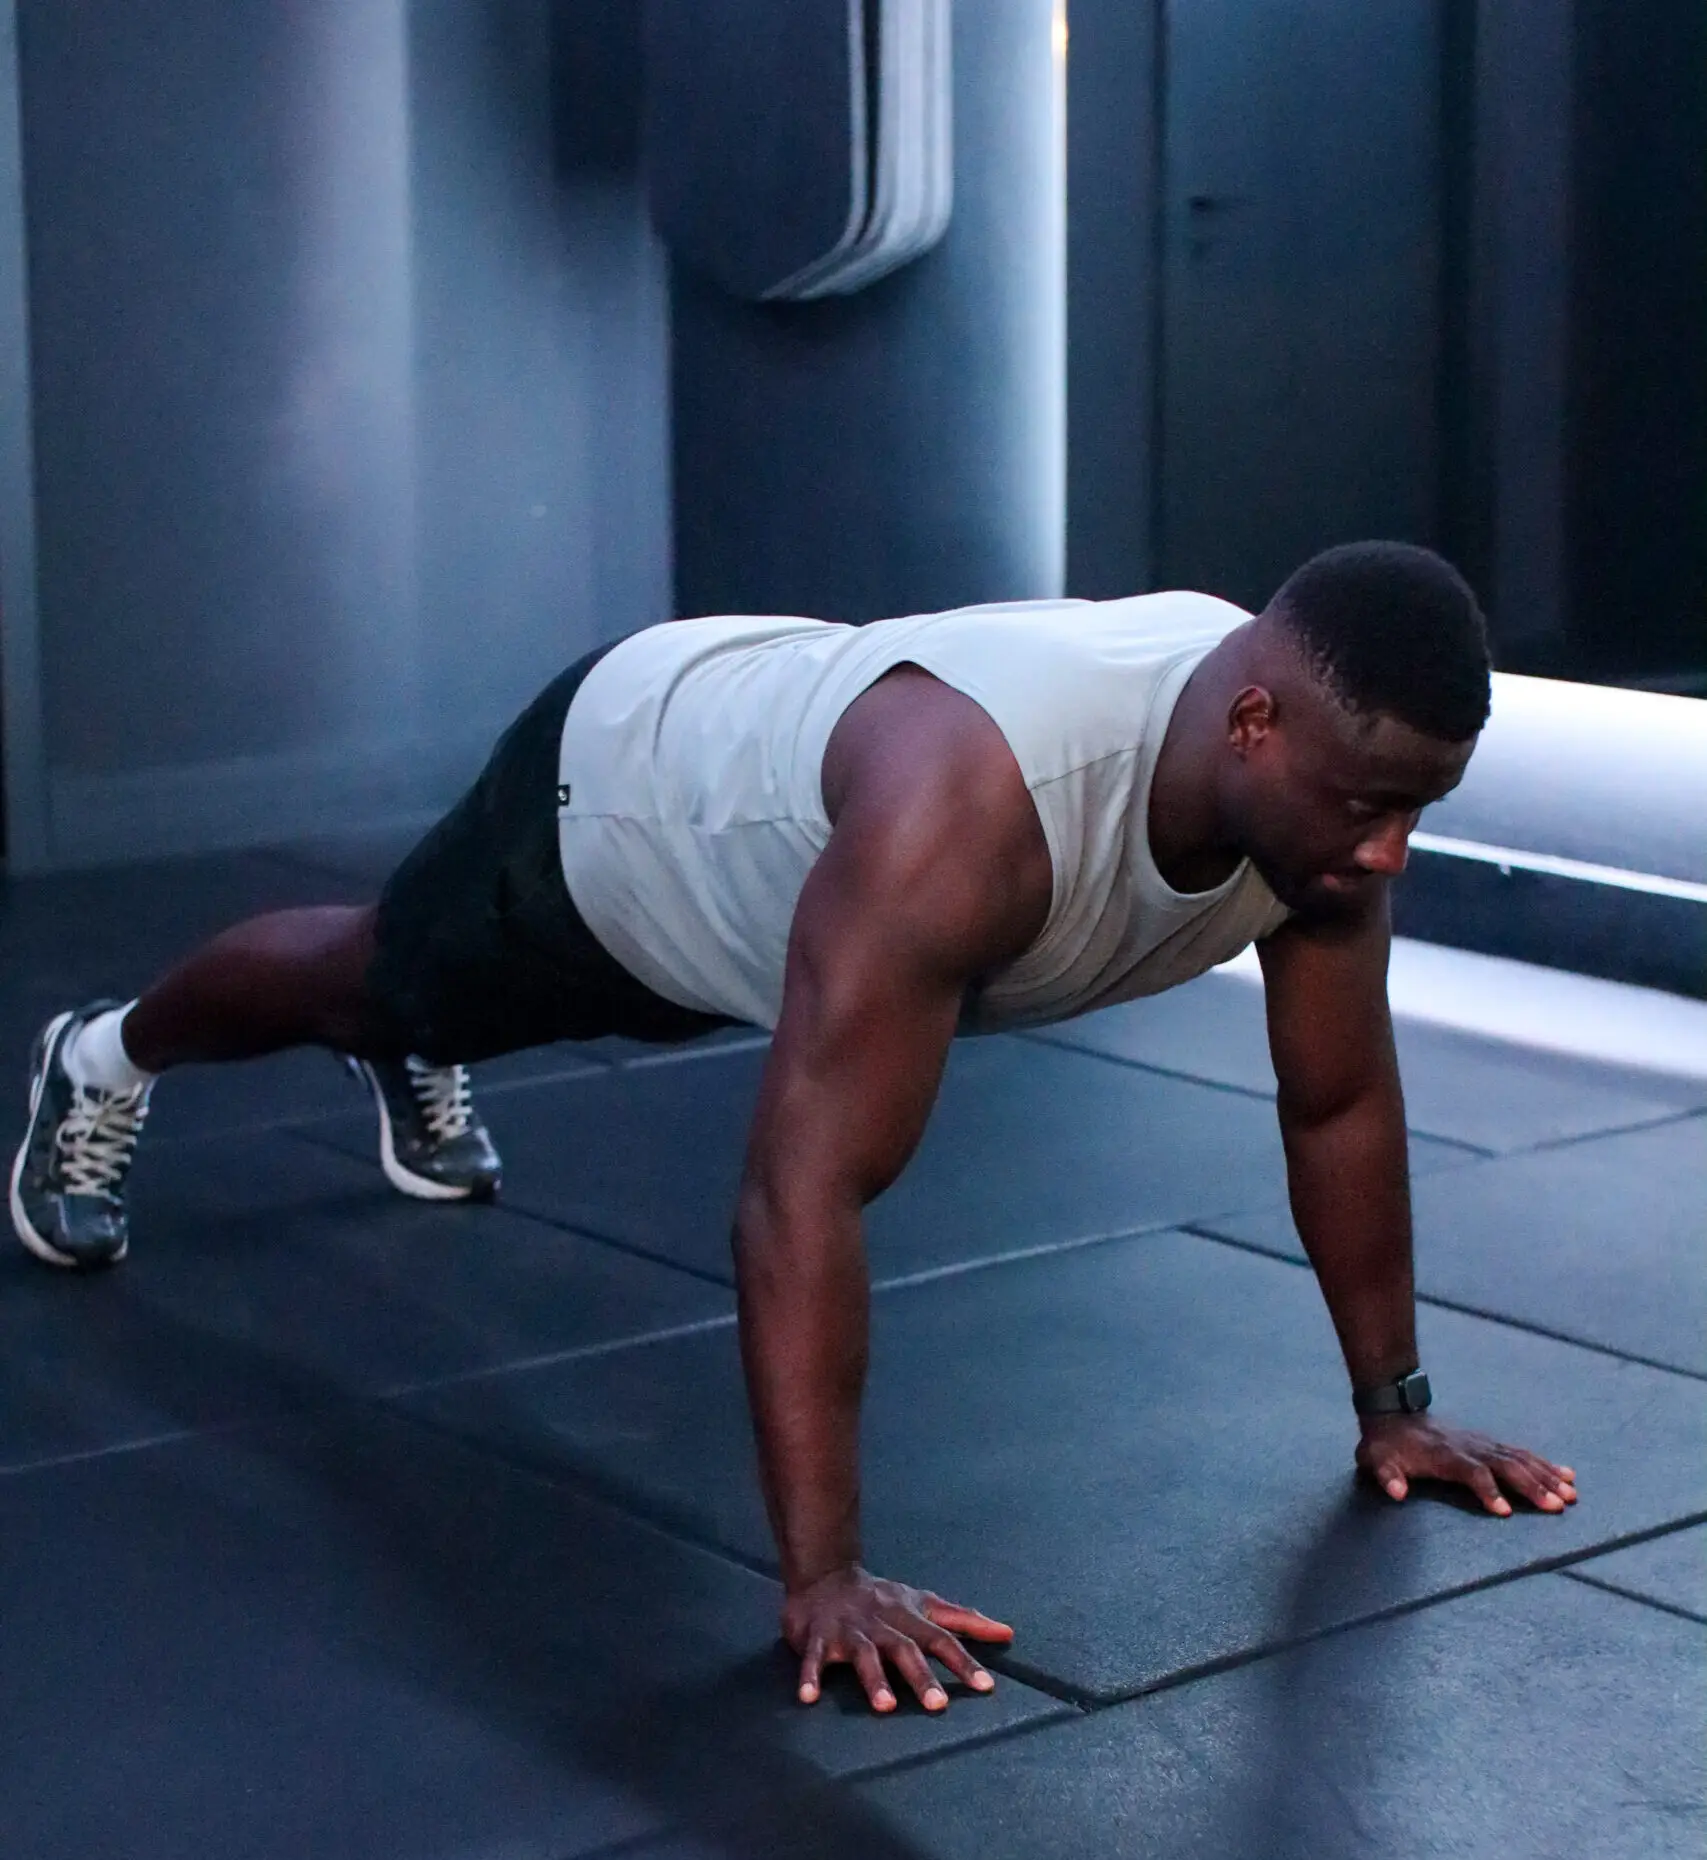
- Push-Ups Push-ups are a classic upper-body strength builder, targeting your chest, shoulders, triceps, and core. Start in a high plank position with your hands slightly wider than shoulder-width apart, and your body in a straight line from head to heels. Proper form tip: Keep your core tight and avoid sagging your hips. Lower your chest to just above the floor, then press back up.
- Beginner variation: Wall Push-Ups – stand facing a wall and “push up” against the wall. Or do Knee Push-Ups on the floor (knees on the ground) to reduce the weight on your arms.
- Standard: Full Push-Ups – on your toes. Aim for 8–12 good reps to start.
- Advanced progression: Decline Push-Ups (feet elevated on a chair to shift more weight to arms) or Diamond Push-Ups (hands close together), which emphasise the triceps. Eventually, you can try one-arm push-ups or explosive clap push-ups for a real challenge!
Why do it: Push-ups build pressing strength and core stability simultaneously. They’re highly scalable – if regular push-ups become easy beyond ~15–20 reps, it’s time to move to a harder variation to keep gaining strength.

- Bodyweight Squats- Squats strengthen your entire lower body – primarily the quadriceps (front thighs), glutes, and hamstrings – and even engage your core. They’re a fundamental movement for building leg strength and functional mobility. Stand with feet shoulder-width apart. Sit your hips back and down as if sitting into an invisible chair, keeping your chest up and knees tracking over (not beyond) your toes. Go as low as you can comfortably (ideally, with your thighs parallel to the floor), then drive through your heels to stand back up.
- Beginner variation: Supported Squats or Box Squats – hold onto a door frame or sturdy chair for assistance, or squat to a highchair/bench, then stand up. This helps if you lack balance or strength and need assistance at first.
- Standard: Air Squats – bodyweight-only, full range squats. Aim for 10–15 reps with good form.
- Advanced progression: Jump Squats (adding an explosive jump at the top for power), or Pistol Squats (single-leg squats) for ultimate leg strength. You can also hold a backpack loaded with books to add resistance if needed.
Why do it: Squats are one of the best exercises to build leg strength and overall muscle. They also improve hip mobility and balance. Mastering the squat will make everyday activities (climbing stairs, lifting objects) easier and safer by strengthening the large muscles of your lower body.

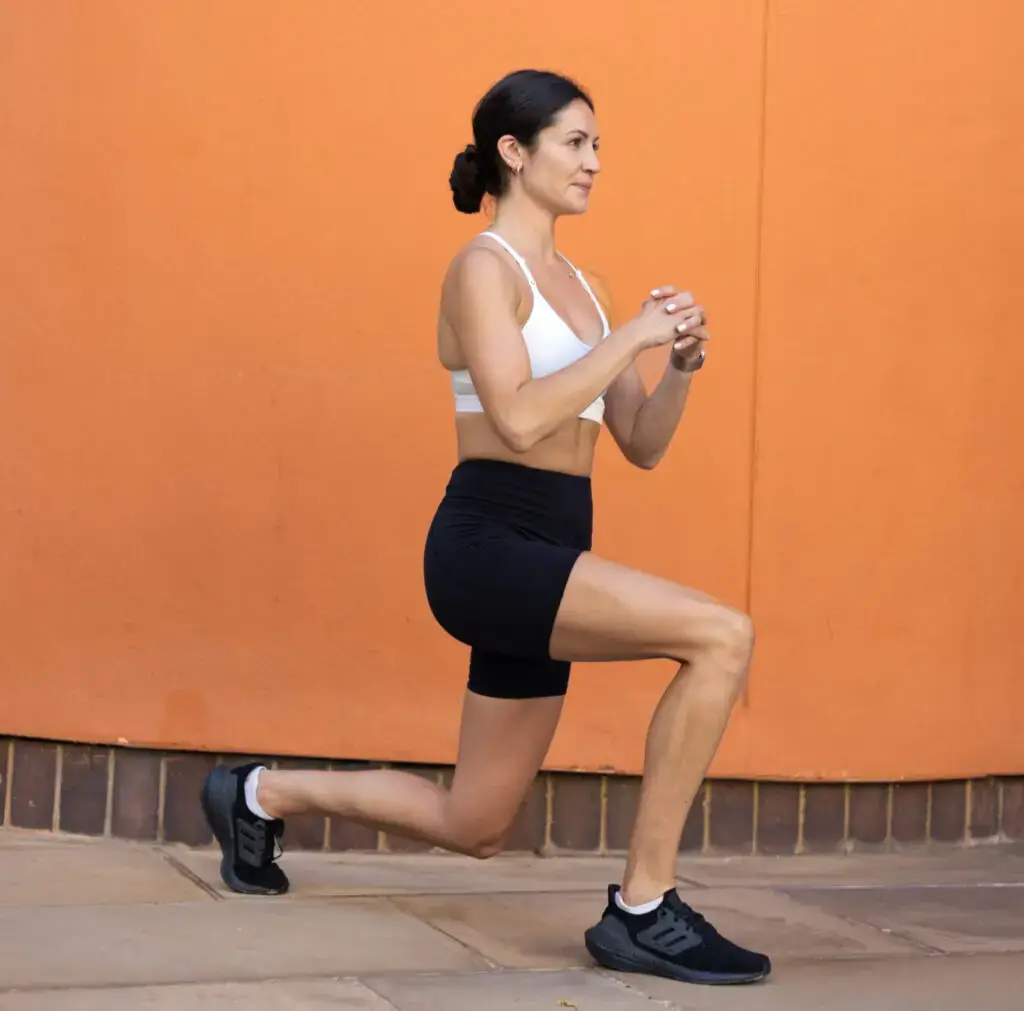
- Lunges-Lunges are another fantastic lower body move that also challenge your balance. They primarily work the glutes, quads, and hamstrings, one leg at a time.
From a standing position, step one foot forward into a stride. Lower your body until the front thigh is nearly parallel to the floor and back knee hovers just above the ground (a 90° bend in both knees). Push through the front heel to return to standing, then repeat on the other leg.
- Beginner variation: Split Squat (Stationary Lunge) – instead of stepping forward and back each rep, keep one foot forward and one back and just lower up and down. Hold a chair for balance if needed. Also, Reverse Lunges(stepping backward) are slightly easier on the knees than forward lunges.
- Standard: Forward or Walking Lunges – stepping into each lunge. Start with 6–8 per leg.
- Advanced progression: Jumping Lunges (switch legs in mid-air) to build power, or Bulgarian Split Squats (back foot elevated on a chair) which put more load on the front leg. These will set your legs on fire and build serious strength!
Why do it: Lunges develop single-leg strength and stability, helping fix strength imbalances between legs. They also engage your core for balance. Strong lunge performance translates to better sports performance and easier daily movements that require one-legged strength or climbing.
- Plank (Core Hold) The plank is an isometric core exercise that strengthens your abs, lower back, and stabiliser muscles. A strong core is crucial for overall strength and injury prevention.
To do a basic forearm plank, support yourself face-down on the floor on your forearms and toes. Your body should form a straight line from head to heels. Key tip: don’t let your hips sag or pike up – maintain a neutral spine. Begin by holding the plank for 20–30 seconds, focusing on engaging your tight abs and maintaining controlled breathing.
- Beginner variation: Knee Plank – do the plank with knees on the ground to reduce the load, gradually building up your core strength.
- Standard: Forearm Plank (30–60 seconds hold). Work up to 1–2 minutes as you get stronger.
- Advanced progression: Extended Plank (arms straight in push-up position, which is slightly harder on core and shoulders) or Side Planks (supporting on one arm/side to target obliques). For a dynamic challenge, try the Plank-to-Pushup (alternating between forearm and hand plank) or one-arm/one-leg planks to significantly increase difficulty.

- Glute Bridge-The glute bridge targets your glutes (butt muscles) and hamstrings and also strengthens your lower back. It’s an important exercise, especially if you sit a lot, because it activates and strengthens the posterior chain.
Lie on your back with knees bent and feet flat on the floor, hip-width apart. Place arms by your sides. Squeeze your glutes and lift your hips toward the ceiling until your body forms a straight line from shoulders to knees. Pause and lower back down under control.
- Beginner variation: You can perform the bridge with a smaller range of motion if needed or focus on holding at the top for a few seconds to build strength.
- Standard: Glute Bridge – 12–15 reps, squeezing glutes at the top of each rep.
- Advanced progression: Single-Leg Glute Bridge – extend one leg and do the bridge on the other leg (much harder!). Alternatively, elevate your feet on a couch or step to increase the range of motion and challenge.
Why do it: Strong glutes and hamstrings improve your posture and protect your lower back. Glute bridges also enhance your squats and lunges by strengthening the muscles that power hip extension. They’re a perfect no-equipment exercise to target the often-neglected backside of the body.
Sample No-Equipment Workout Routine
To put it all together, here’s a sample home workout routine combining the above exercises. This is a circuit-style routine that works your whole body. Perform each exercise in succession, rest briefly as needed, and repeat the circuit 3-4 times:
- Bodyweight Squats – 15 reps
- Push-Ups – 10 reps (or appropriate variation for your level)
- Lunges – 8 reps each leg
- Glute Bridges – 12 reps
- Plank – 30 seconds
Rest for 1 minute, then repeat the circuit. Aim to complete 2-3 rounds in total. This routine targets all major muscle groups and raises your heart rate. Adjust the rep counts or exercise variations to match your ability – for instance, do knee push-ups or assisted squats if needed, or make exercises harder if they’re too easy (remember the principle of progressive overload!).
As you become stronger, you can increase the number of reps or rounds or try more advanced versions of the moves. Consistency is key – doing this routine 3 times per week with rest days in between for recovery is a great start. And always focus on good form over speed. Quality representatives will build strength faster than those who are sloppy.
Sources:
- Harvard Health Publishing – “The advantages of body-weight exercise”
- FitBudd – Fitness Industry Trends 2024 (home workout statistics)
- NerdFitness – “Beginner Bodyweight Workout” (progressive overload tips)
- Just12Reps – FAQ: Using the 12Reps app for no-equipment workouts
