


You’re in the gym. You load the bar for squats. You think… was it 50kg or 55kg last week? You’re not sure. You guess 50kg. You complete your sets. Next week, same uncertainty. You guess 52.5kg. The week after, maybe 50kg again? You can’t remember.
Six months later, you’re working just as hard, but you’re still lifting roughly the same weights. You’re frustrated. Where are the results?
Here’s what usually happens: you train consistently, you eat properly, you sleep well—but you never actually track whether you’re progressing. You rely on memory, vague feelings, and guesswork. Meanwhile, progressive overload—the foundation of muscle and strength gains—never happens because you don’t know what you did last week.
The problem isn’t lack of effort—it’s lack of data. You can’t improve what you don’t measure.
I’m Will Duru, a personal trainer with over 10 years’ experience in London. Every woman I’ve coached who tracks her workouts makes faster progress than those who don’t. It’s not even close.
This guide explains exactly why tracking workouts matters, what specific metrics to log (and what not to waste time recording), how to track workouts efficiently without disrupting training, four tracking methods (apps, notebooks, spreadsheets, 12REPS), and how to use your tracking data to ensure progressive overload.
Why Tracking Your Workouts Actually Matters
The Core Problem: Your Memory Is Unreliable
You will not remember:
- Exact weights used 7 days ago across 15+ sets
- How many reps you achieved on each set
- Whether you used 10kg or 12.5kg dumbbells for lunges
- If you did 3 sets or 4 sets of an exercise
- Whether you struggled on set 2 or set 3
You might remember:
- Approximate weight ranges (“somewhere around 50kg”)
- Whether a session felt “hard” or “easy”
- General trends (“I think I’m getting stronger”)
The result: Without tracking, you guess. Sometimes you overestimate and lift heavier than last week (good). Sometimes you underestimate and lift lighter than last week (wasted session). Most often, you lift roughly the same weight for months, making zero progress.
What Progressive Overload Actually Requires
Progressive overload definition: Gradually increasing training stress over time to force adaptation.
Methods of progressive overload:
- Increase weight (most common)
- Increase reps (same weight, more reps)
- Increase sets (more total volume)
- Decrease rest periods (same work, less recovery)
- Improve form (greater range of motion, better control)
The problem: You cannot execute progressive overload without knowing what you did previously.
Example without tracking:
- Week 1: Squat 50kg, 3 sets × 8 reps (you don’t record this)
- Week 2: You think “about 50kg last week,” so you do 50kg again
- Week 3: Actually, maybe it was 52.5kg? You do 52.5kg
- Week 4: Back to 50kg to be safe
- Result after 12 weeks: Still squatting 50-52.5kg
Example with tracking:
- Week 1: Squat 50kg, 3 sets × 8, 8, 7 reps (recorded)
- Week 2: Target 50kg, 3 sets × 8, 8, 8 reps (all sets hit 8 reps—progress)
- Week 3: Increase to 52.5kg, 3 sets × 8, 7, 6 reps (recorded)
- Week 4: 52.5kg, 3 sets × 8, 8, 7 reps (more reps—progress)
- Week 5: 52.5kg, 3 sets × 8, 8, 8 (all sets complete—time to increase weight)
- Week 6: Increase to 55kg
- Result after 12 weeks: Squatting 60-65kg (20-30% strength increase)
The difference is data. Tracking transforms vague effort into systematic progress.
Additional Benefits of Tracking
1. Identifies plateaus immediately Instead of wondering “am I making progress?”, you can see: “I’ve been at 12kg dumbbell press for 4 weeks—time to try 14kg or add reps.”
2. Prevents accidental regression Without tracking, you might inadvertently use lighter weights than last week without realising, actually getting weaker rather than stronger.
3. Provides motivation Seeing measurable progress (50kg → 60kg over 3 months) is incredibly motivating. “Feeling” stronger is subjective; data is objective.
4. Informs programming adjustments If bench press strength hasn’t increased in 8 weeks whilst squat strength is progressing well, you know upper body training needs adjustment.
5. Manages fatigue Tracking across weeks reveals when performance drops significantly, indicating you need a deload week rather than pushing through.
6. Creates accountability Knowing you’ll record today’s performance makes you more likely to push for one extra rep rather than stopping early.
What to Track (Essential Metrics)
Track these four metrics for every exercise, every session. Nothing more is necessary.
1. Exercise Name
Why: Ensures you’re comparing like-for-like week to week.
How to record:
- Be specific: “Barbell Back Squat” not just “Squat”
- Include variation: “Flat Barbell Bench Press” vs “Incline Dumbbell Bench Press”
- Note equipment: “Leg Press (Machine A)” if gym has multiple machines
Example log:
- Barbell Back Squat
- Romanian Deadlift
- Leg Press (45-degree machine)
- Walking Lunges (dumbbells)
2. Weight Used
Why: Core metric for tracking strength progression.
How to record:
- Note total weight: “60kg” for barbell (includes bar weight), “12kg DBs” for dumbbells
- Be precise: record 52.5kg, not “about 50kg”
- Include bodyweight for bodyweight exercises: “Bodyweight (61kg) + 10kg weight vest”
Special cases:
- Machines: record weight stack number (e.g., “Pin 8 = 40kg”)
- Cables: record pin position + weight
- Bodyweight only: note “BW” or tick mark
3. Sets × Reps
Why: Tracks volume (total work performed) and identifies when to increase weight.
How to record:
- Format: “3 × 8, 8, 7” means 3 sets: first set 8 reps, second set 8 reps, third set 7 reps
- Alternative format: “3 × 8” if all sets achieved target reps
- Note failed reps: “10, 8, 6” shows fatigue across sets
Target reps:
- If prescription is “3 × 8-10 reps,” aim to hit 10 reps on all sets before increasing weight
- Once you achieve “3 × 10, 10, 10,” increase weight next session
4. Date
Why: Tracks frequency and identifies weekly patterns.
How to record:
- Standard format: “19/12/2024” (UK format: DD/MM/YYYY)
- Allows you to see: “Last trained legs 5 days ago—appropriate rest period”
These four metrics are sufficient. Anything beyond this is optional optimisation.
What NOT to Track (Unnecessary Metrics)
These metrics are either too subjective, too time-consuming, or don’t meaningfully inform programming.
1. Exact Rest Periods
Why not: Unless you’re a competitive powerlifter, exact rest duration (2:13 vs 2:30) doesn’t significantly impact hypertrophy training.
What to do instead: Use general guidelines (2-3 minutes for main lifts, 60-90 seconds for accessories) without obsessive timing.
2. Detailed RPE After Every Set
What RPE is: Rate of Perceived Exertion, scale 1-10 indicating how hard a set felt.
Why not: Time-consuming to log after every set. Creates analysis paralysis.
When it’s useful: Recording RPE for main lifts only (squats, deadlifts, bench press) can inform whether you need deload, but logging it for every exercise is overkill.
3. Heart Rate During Training
Why not: Heart rate during strength training doesn’t correlate well with effort or results. It’s useful for cardio, irrelevant for hypertrophy work.
4. Exact Session Duration
Why not: Session length varies due to gym crowding, equipment availability, rest periods—none of which matter if you completed your prescribed work.
What matters: Did you complete 3 sets × 10 reps at 50kg? Yes. That’s all you need to know.
5. Muscle Soreness Levels
Why not: Soreness correlates poorly with muscle growth. You can build muscle without soreness, and soreness doesn’t guarantee growth.
6. Mood/Energy Levels
Why not: Highly subjective. What feels like “6/10 energy” one week might be “8/10” another week depending on sleep, stress, caffeine, etc.
Exception: If you’re experiencing unusual fatigue across multiple sessions, a brief note (“felt exhausted all week—stressed at work”) can help identify patterns later.
Keep tracking simple. Exercise, weight, sets × reps, date. That’s it.
Four Methods for Tracking Workouts
Choose based on personal preference. All work if used consistently.
Method 1: Notebook/Paper Log
What it is: Physical notebook dedicated to training log.
How to use:
- Dedicate one page per workout session
- Write date at top
- List exercises in order performed
- Record weight and reps for each set
- Bring notebook to gym each session
Example entry:
Advantages:
✅ Simple, no technology required
✅ Quick to write between sets
✅ No battery concerns
✅ Easy to flip back and see previous week’s numbers
✅ Inexpensive (£2-5 notebook)
Disadvantages:
❌ Can’t analyse trends easily (no graphs)
❌ Can get wet/damaged in gym bag
❌ Difficult to search for specific exercises
❌ No reminders or prompts
Best for: Women who prefer low-tech solutions, dislike phones in gym, want simple effective tracking.
My experience: I used notebooks for my first 5 years of training. Perfectly effective.
Method 2: Spreadsheet (Google Sheets/Excel)
What it is: Digital spreadsheet tracking workouts.
How to use:
- Create template with exercise names down left column
- Add columns for each week (Date, Weight, Sets × Reps)
- Fill in after each workout
- Access on phone or computer
Example spreadsheet structure:
| Exercise | 9/12 | 12/12 | 16/12 | 19/12 |
|---|---|---|---|---|
| Squat | 60kg 3×8 | 60kg 3×8,8,8 | 62.5kg 3×8,7,6 | 62.5kg 3×8,8,7 |
| RDL | 50kg 3×10 | 50kg 3×10,10,9 | 52.5kg 3×10,9,8 | 52.5kg 3×10,10,9 |
Advantages:
✅ Easy to spot trends (see progression across weeks)
✅ Can create graphs automatically
\✅ Accessible from any device
✅ Easy to copy/duplicate for new training blocks
✅ Can share with coach for feedback
Disadvantages:
❌ More time-consuming to enter data
❌ Requires phone/tablet in gym
❌ Can be fiddly to navigate during workout
❌ Requires basic spreadsheet knowledge
Best for: Women who enjoy data analysis, want visual progression graphs, train with coach who reviews logs.
Method 3: Workout Tracking Apps
What it is: Dedicated smartphone apps for logging workouts.
Popular options:
- Strong: Simple interface, tracks PRs automatically
- Hevy: Social features, exercise library with videos
- FitNotes: Free, clean interface
- StrongLifts: Designed for 5×5 programme specifically
How to use:
- Download app
- Create workout template or use pre-built programmes
- Open app during workout
- Tap to log each set’s weight and reps
- App shows previous session’s numbers automatically
Advantages:
✅ Shows previous session’s data automatically (no flipping through pages)
✅ Automatically calculates volume, PRs, estimated 1RM
✅ Creates progression graphs
✅ Rest timer built in
✅ Exercise library with instructions
✅ Cloud backup (never lose data)
Disadvantages:
❌ Phone battery concerns
❌ Distracting notifications during workout
❌ Can be slow to navigate between exercises
❌ Many require subscriptions (£5-10/month)
❌ Overwhelming features you may never use
Best for: Women who always have phone at gym, want automatic progression tracking and graphs, don’t mind monthly subscription.
My recommendation: If choosing an app, start with FitNotes (free) or Strong (freemium) before paying for subscriptions.
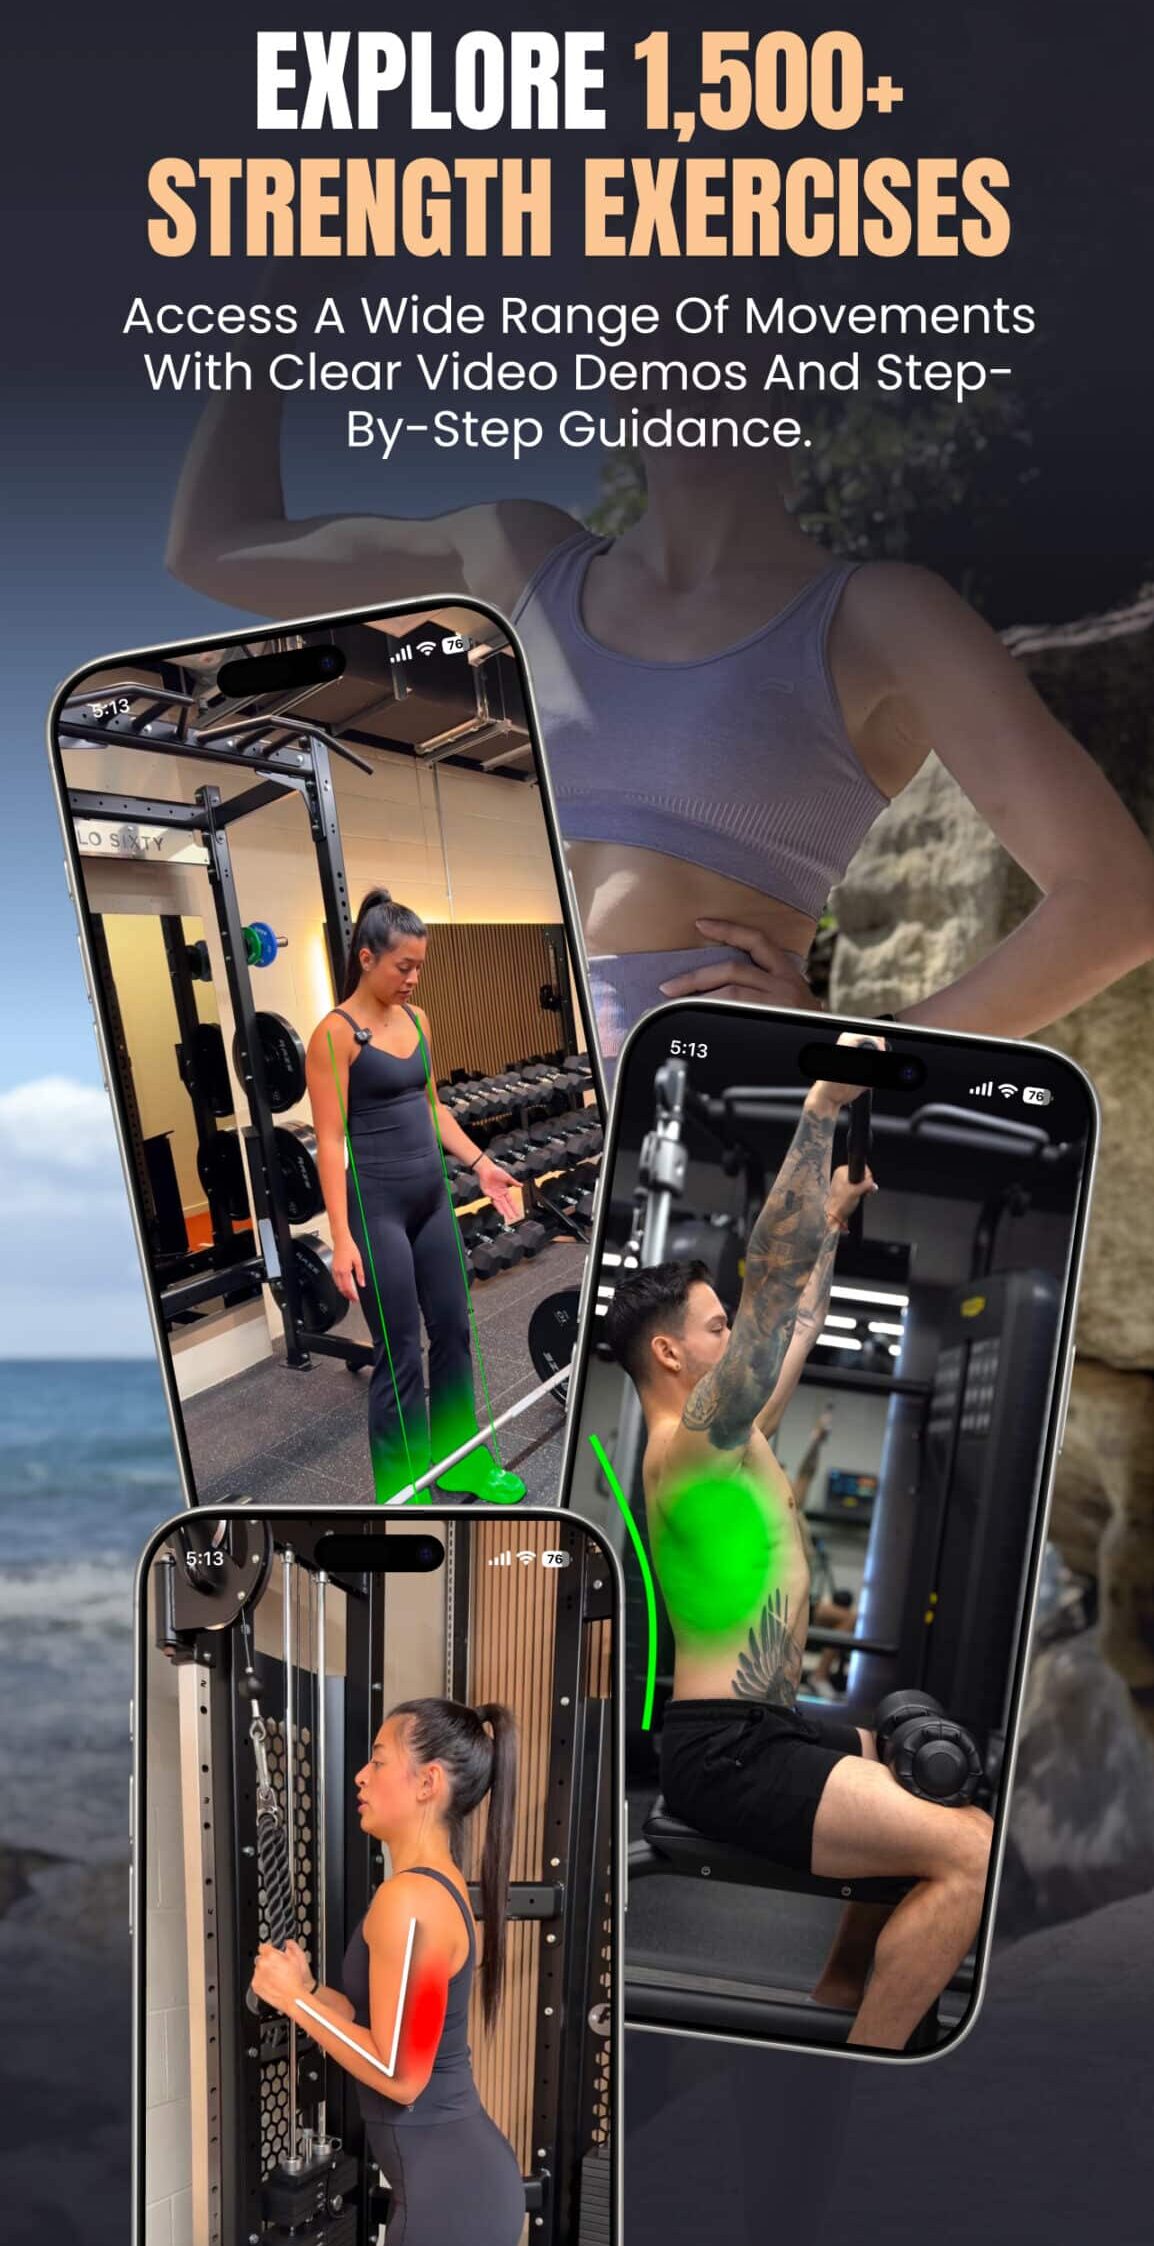
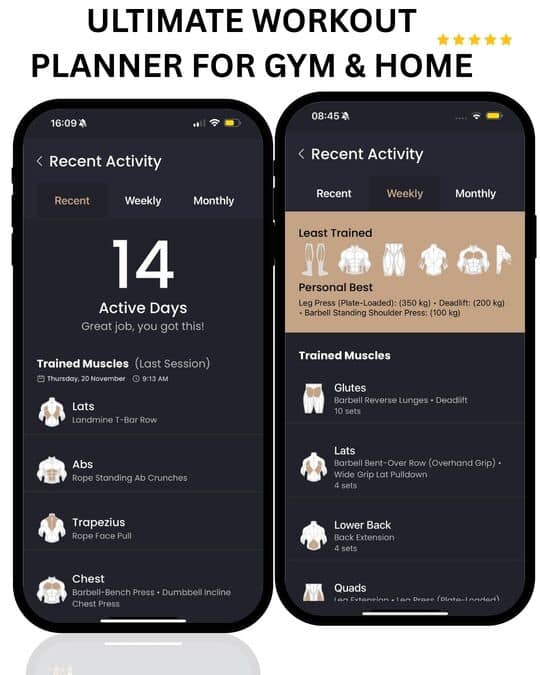
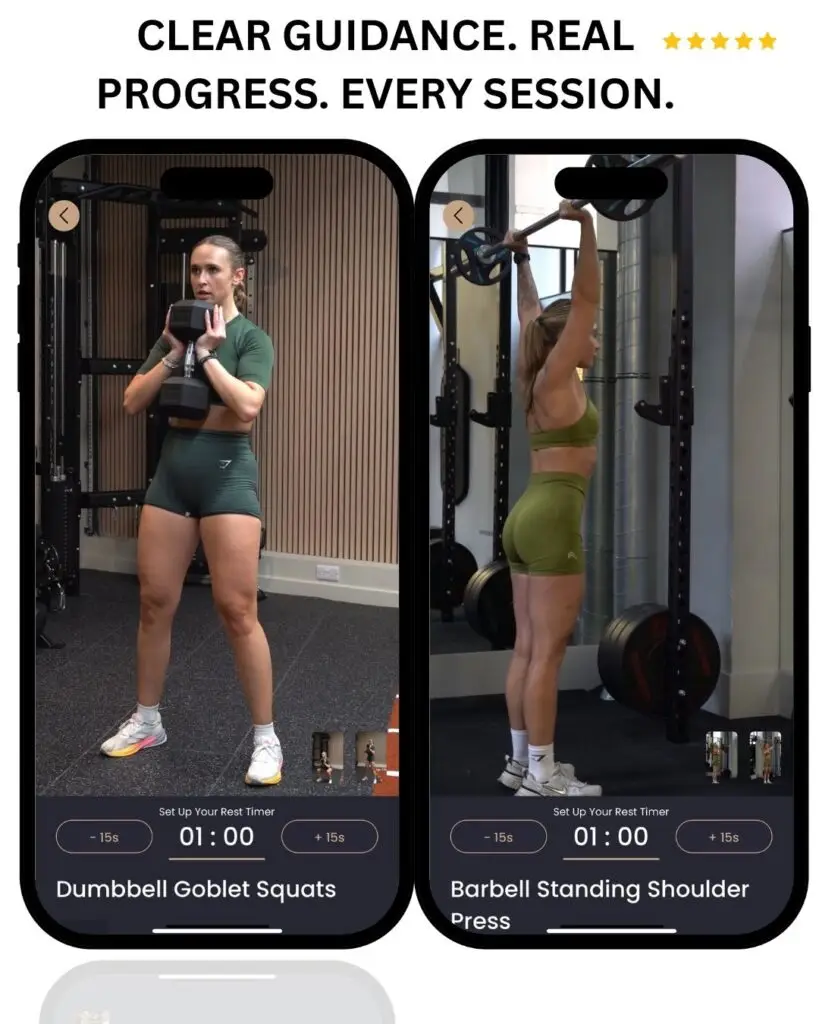
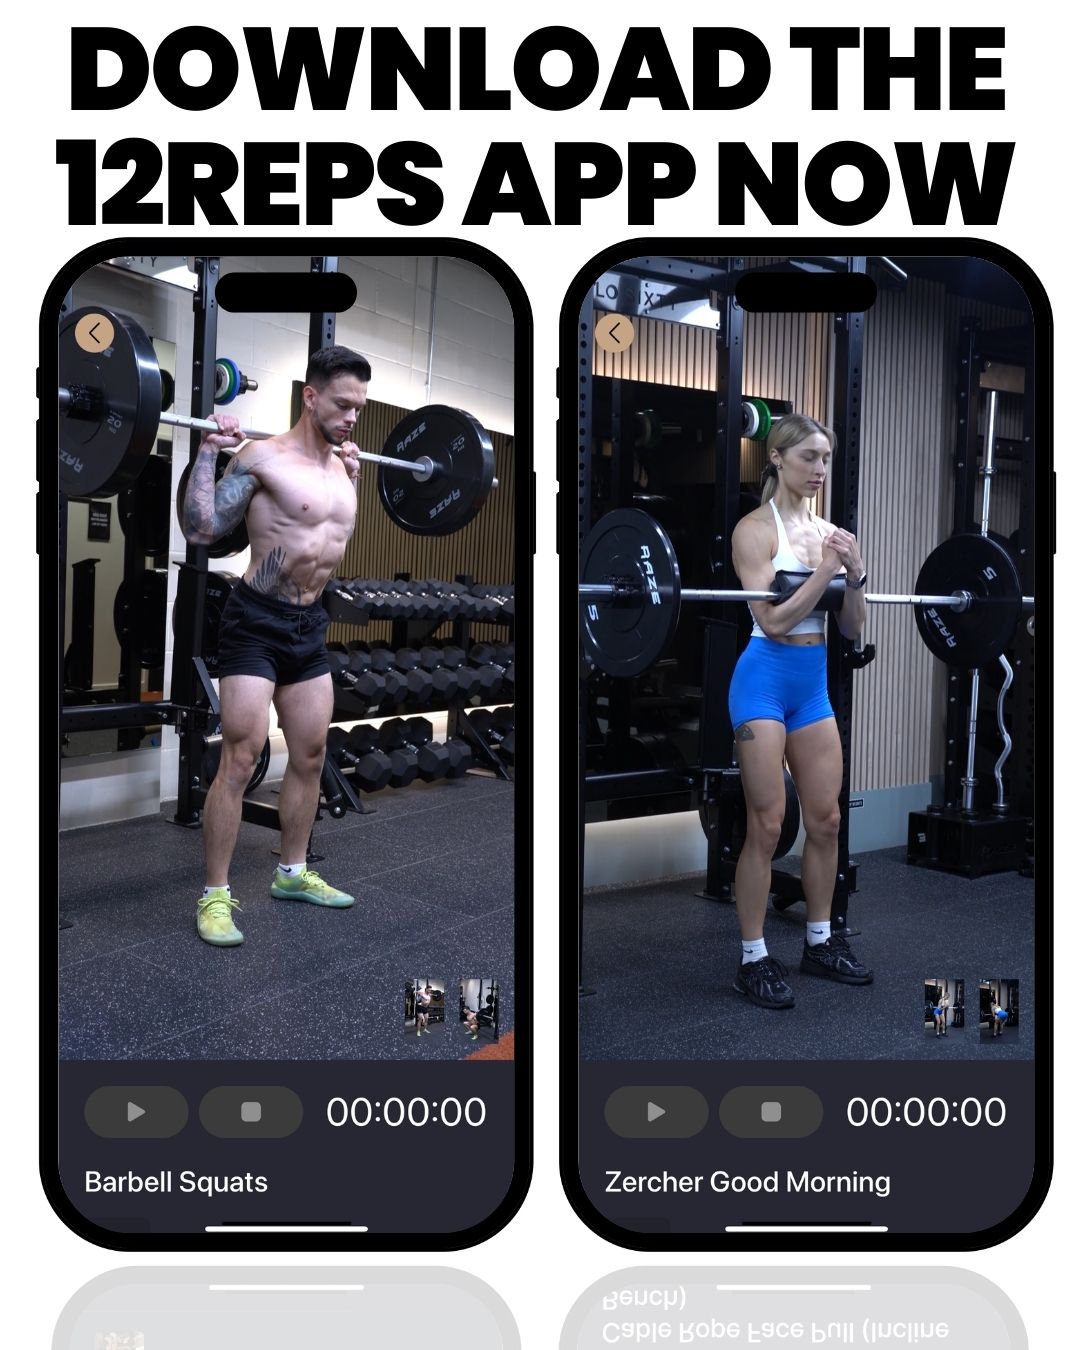
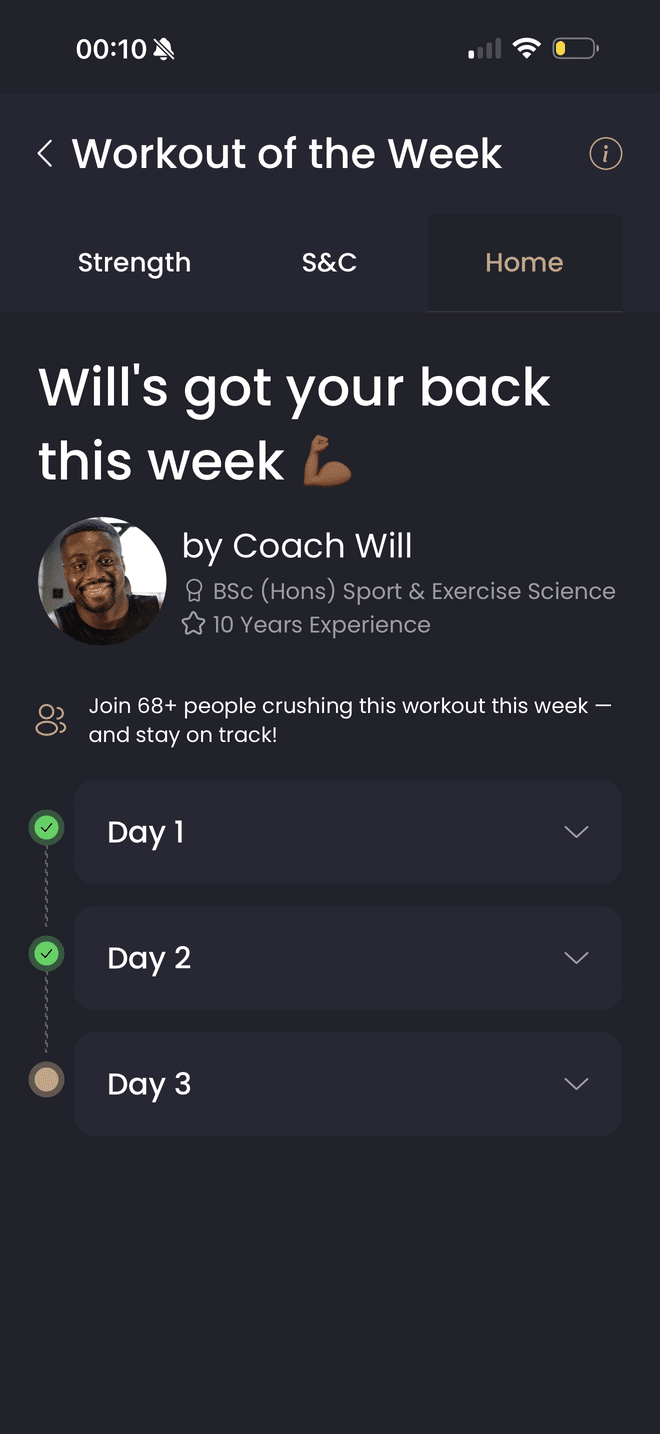
Method 4: 12REPS (Integrated Training + Tracking)
What it is: Training app that programmes your workouts AND tracks your progress automatically.
How it differs from pure tracking apps: 12REPS generates your entire training programme based on goals, experience, equipment, and schedule—then tracks execution automatically.
How it works:
- App prescribes today’s workout: “Squat 3 × 8 reps @ 60kg”
- You perform the workout
- You log what you actually achieved: “8, 8, 7 reps”
- App analyses your performance
- Next week, app adjusts prescription: “Squat 3 × 8 reps @ 60kg” (aim for 8, 8, 8)
- Once you hit all target reps, app increases weight automatically: “Squat 3 × 8 reps @ 62.5kg”
Advantages:
✅ Removes all programming guesswork (app decides exercises, sets, reps, progression)
✅ Integrated tracking (no separate app needed)
✅ Automatic progression (app increases weight when appropriate)
✅ Adapts to your actual performance (if you plateau, app adjusts)
✅ Exercise video library (1,500+ demonstrations)
✅ Works for gym, home, or hybrid training
Disadvantages:
❌ Less flexibility (can’t easily programme your own workouts)
❌ Requires subscription (£19.99/month)
❌ Only works if you follow 12REPS programmes
Best for: Women who want programming AND tracking handled automatically, don’t want to create their own programmes, prefer systematic progression without decision-making.
When to use: If you’re new to strength training or don’t enjoy programming yourself. 12REPS solves both “what to do” and “how to track it” simultaneously.
How to Use Your Tracking Data
Collecting data is pointless unless you actually use it to drive progression.
Weekly Review: Did I Progress?
Every week, before your next session, review last week’s performance and set targets.
Example: Lower Body Session
Last Monday (9/12):
- Squat: 60kg 3 × 8, 8, 7
- RDL: 50kg 3 × 10, 10, 9
- Leg Press: 100kg 3 × 12, 12, 11
This Monday (16/12) targets:
- Squat: 60kg 3 × 8, 8, 8 (aim to hit 8 reps on third set)
- RDL: 50kg 3 × 10, 10, 10 (aim to hit 10 reps on third set)
- Leg Press: 100kg 3 × 12, 12, 12 (aim to hit 12 reps on third set)
Simple rule: If you achieved all target reps across all sets last week, increase weight by smallest increment (usually 2.5kg for barbell, 2kg for dumbbells).

How 12REPS Handles DOMS and Recovery
Understanding soreness is one thing. Actually programming training around appropriate recovery whilst ensuring progressive overload continues is another.
12REPS handles recovery intelligently:
1. Appropriate training splits: For beginners, the app programmes full body workouts 2-3x weekly, ensuring 48-72 hours between training same muscle groups—allowing DOMS to resolve.
2. Progressive volume: The app doesn’t jump from 3 sets to 6 sets overnight. Volume increases gradually over weeks, minimising DOMS severity whilst maintaining progression.
3. Built-in deload weeks: Every 5-8 weeks, the app automatically programmes a deload (reduced volume/intensity), allowing accumulated fatigue and residual soreness to clear.
4. Exercise variety over time: The app progresses you from easier variations (bodyweight squats) to harder variations (barbell squats) gradually, minimising DOMS from sudden exercise changes.
5. Adaptation tracking: If you consistently report difficulty completing workouts or excessive fatigue, the app adjusts programming to improve recovery.
Try 12REPS free for 7 days. Stop worrying about whether you’re recovered enough to train—follow programming designed to balance progressive overload with appropriate recovery.
The Bottom Line
Muscle soreness after workouts is normal, expected, and not a reliable indicator of training effectiveness.
When DOMS is normal:
✅ Starting new training programme (weeks 1-4)
✅ Returning after 3+ weeks off
✅ New exercises or movement patterns
✅ Significant increase in volume or intensity
✅ Bilateral, diffuse muscle aching
✅ Peaks day 2-3, resolves by day 5-7
When to worry:
❌ Unilateral (one-sided) sharp pain
❌ Pain during or immediately after exercise
❌ Pain worsening daily instead of improving
❌ Dark urine, extreme weakness, confusion
❌ Pain preventing basic daily activities
❌ Lasting beyond 7-10 days
Key truths about soreness:
- Soreness ≠ effectiveness (you build muscle without soreness once adapted)
- Soreness ≠ muscle growth (magnitude of soreness doesn’t predict gains)
- Reducing soreness over time = positive adaptation, not reduced effort
- The “repeated bout effect” means exercises cause less soreness each time
Managing DOMS effectively:
✅ Light active recovery (most effective—walking, gentle cycling, swimming)
✅ Massage or foam rolling (moderately effective)
✅ Adequate sleep (7-9 hours, critical for recovery)
✅ Sufficient protein (1.8-2.2g/kg bodyweight)
✅ Progressive overload (gradual increases prevent excessive soreness)
Training whilst sore:
✅ Different muscle groups: always acceptable
✅ Mild soreness (3-4/10): can train affected muscles with thorough warm-up
✅ Moderate soreness (5-6/10): reduce volume/intensity or skip
✅ Severe soreness (7+/10): train different muscles only
Women who build the most muscle and strength aren’t those chasing maximal soreness—they’re those who train consistently, recover appropriately, and understand that diminishing soreness indicates successful adaptation, not reduced effectiveness.
Soreness is a temporary side effect of progress, not the goal itself.
References
- Cheung, K., Hume, P. and Maxwell, L. (2003). Delayed Onset Muscle Soreness: Treatment Strategies and Performance Factors. Sports Medicine, 33(2), pp.145-164. https://doi.org/10.2165/00007256-200333020-00005
- Connolly, D.A.J., Sayers, S.P. and McHugh, M.P. (2003). Treatment and Prevention of Delayed Onset Muscle Soreness. Journal of Strength and Conditioning Research, 17(1), pp.197-208. https://doi.org/10.1519/00124278-200302000-00030
- Flann, K.L., LaStayo, P.C., McClain, D.A., Hazel, M. and Lindstedt, S.L. (2011). Muscle Damage and Muscle Remodeling: No Pain, No Gain? The Journal of Experimental Biology, 214(4), pp.674-679. https://doi.org/10.1242/jeb.050112
- Schoenfeld, B.J. (2012). Does Exercise-Induced Muscle Damage Play a Role in Skeletal Muscle Hypertrophy? Journal of Strength and Conditioning Research, 26(5), pp.1441-1453. https://doi.org/10.1519/JSC.0b013e31824f207e
- Torres, R., Ribeiro, F., Alberto Duarte, J. and Cabri, J.M.H. (2012). Evidence of the Physiotherapeutic Interventions Used Currently After Exercise-Induced Muscle Damage: Systematic Review and Meta-Analysis. Physical Therapy in Sport, 13(2), pp.101-114. https://doi.org/10.1016/j.ptsp.2011.07.005
