


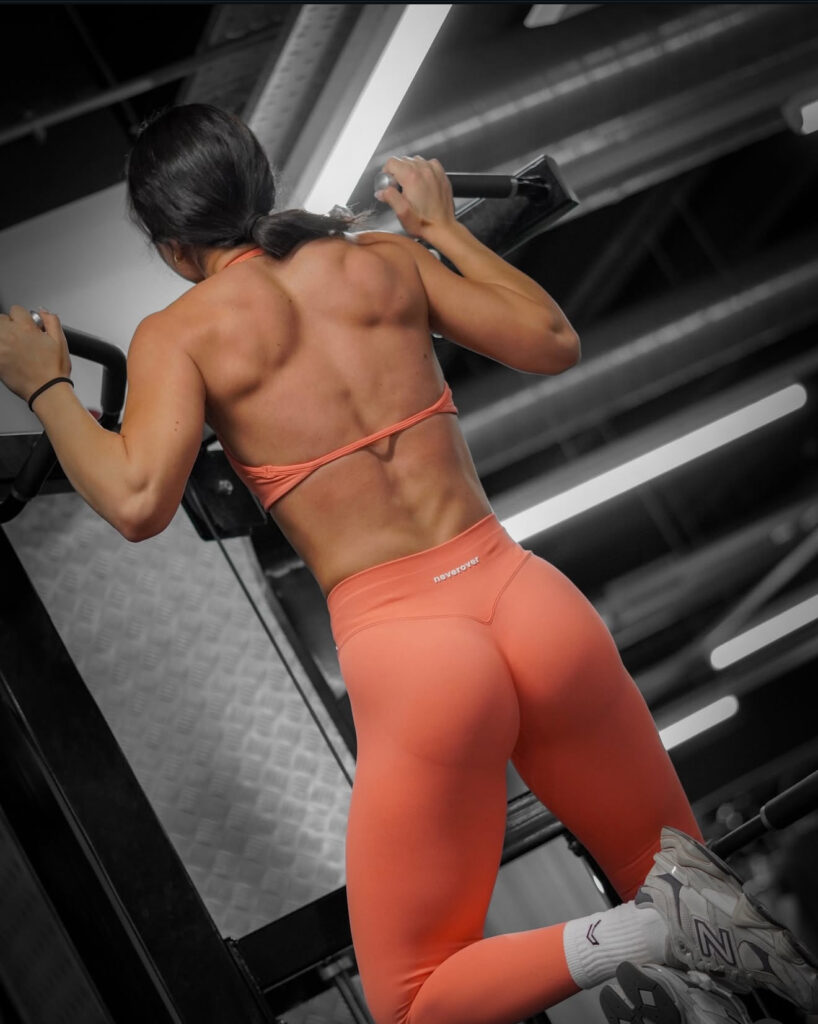
The deadlift intimidates more women than any other exercise.
It looks complicated. It looks dangerous. It looks like something only serious lifters do. The bar is on the floor. You have to bend down, grip it, and lift it whilst maintaining perfect form. One wrong move and you’ll hurt your back, right?
So you avoid it. You stick to machines. You do leg press instead. You tell yourself deadlifts aren’t necessary.
But deep down, you know you’re missing out on something powerful.
I’m Will Duru, a personal trainer with over 10 years’ experience in London. I’ve taught hundreds of women to deadlift safely. The deadlift is the single best exercise for building full-body strength. Not just for aesthetics—for functional power that transfers to everything else in life.
Here’s exactly how to deadlift properly, why it matters, and how to progress from an empty 20kg barbell to impressive weights.
Why Deadlifts Are Non-Negotiable
Before technique, understand why this exercise is worth learning.
Deadlifts build strength you actually use. Picking something heavy off the floor is a fundamental human movement. Lifting luggage. Moving furniture. Carrying shopping. Playing with children. The deadlift trains precisely this pattern.
Deadlifts train your entire posterior chain. Your glutes, hamstrings, entire back, traps, and grip all work simultaneously. One exercise building strength everywhere.
Deadlifts improve posture dramatically. You strengthen every muscle responsible for keeping your spine upright. Stronger spinal erectors mean better posture during everything else you do.
Deadlifts build bone density. Loading your spine with heavy weight stimulates bone growth. This is critical for women, particularly for preventing osteoporosis later in life.
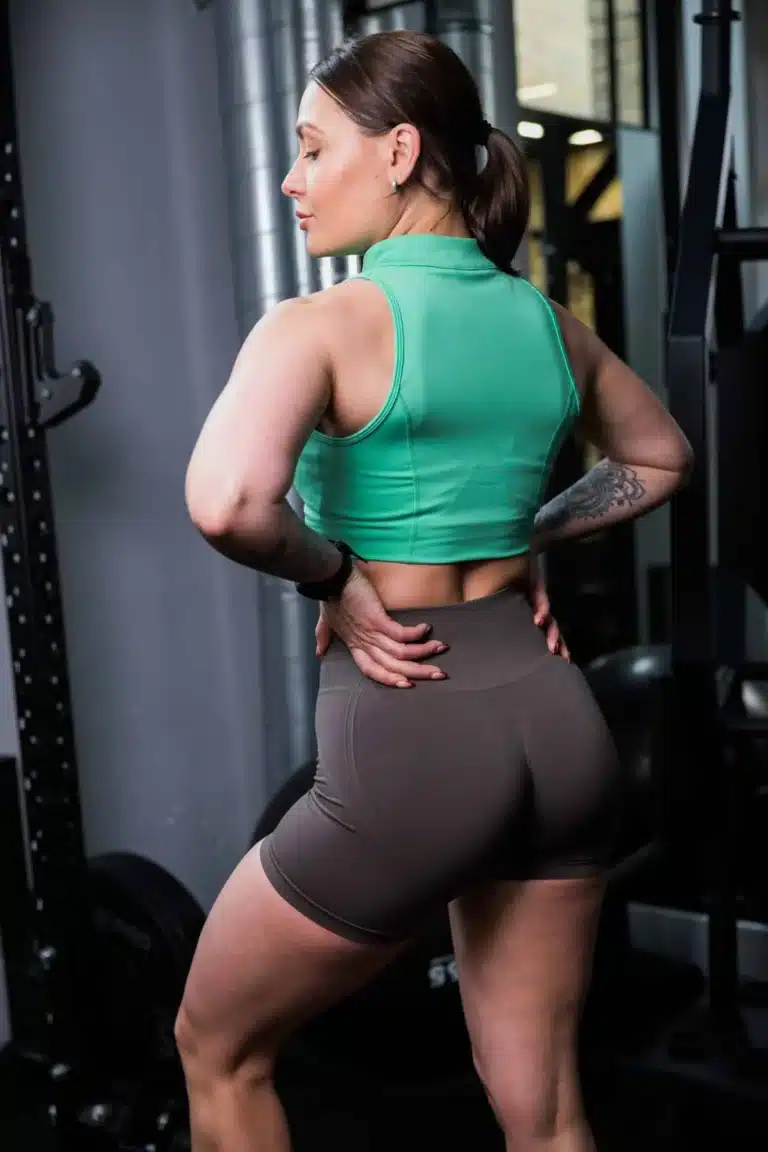
Deadlifts make you feel powerful. There’s something primal about lifting heavy weight off the ground. You feel capable. Strong. Confident.
I trained a woman who started deadlifting at 45. She’d never lifted weights before. Within 18 months, she was deadlifting 100kg. “I feel like I could handle anything now,” she told me. That’s the psychological shift deadlifts create.
Muscles Worked
Primary muscles:
- Glutes: The main hip extensors driving the movement
- Hamstrings: Work with glutes to extend hips
- Spinal erectors (back): Maintain neutral spine throughout
- Quadriceps: Involved in the initial pull from floor
- Lats (back): Keep the bar close to your body
Secondary muscles:
- Traps: Upper back stability
- Forearms and grip: Hold onto the bar
- Core: Entire midsection braces to protect spine
The deadlift is the ultimate compound movement. You’re training more muscle simultaneously than any other single exercise.
Equipment Needed
Essential:
- Barbell (standard Olympic bar weighs 20kg)
- Weight plates
- Flat, stable surface (rubber gym flooring ideal)
Optional but helpful:
- Lifting straps (for heavy weights when grip fails)
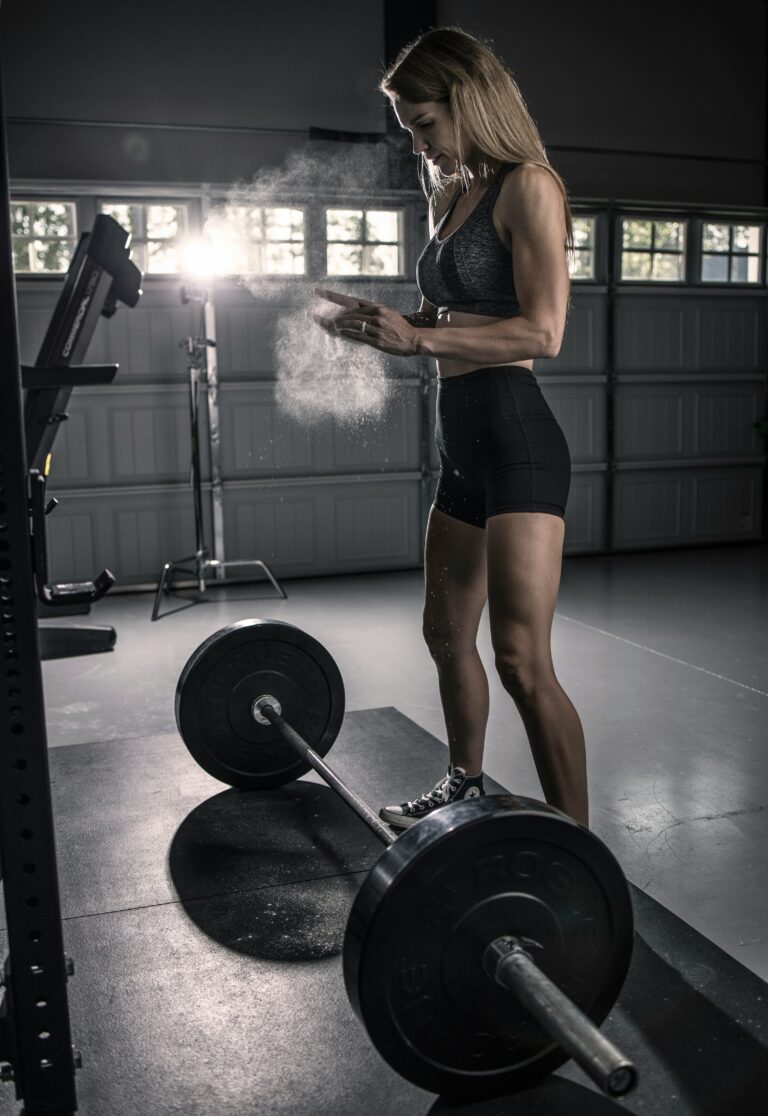
- Chalk (improves grip)
- Flat-soled shoes or lift barefoot (no cushioned trainers)
- Weightlifting belt (for very heavy sets, not necessary for beginners)
Most commercial gyms have everything needed. Home setup requires barbell, plates, and space.
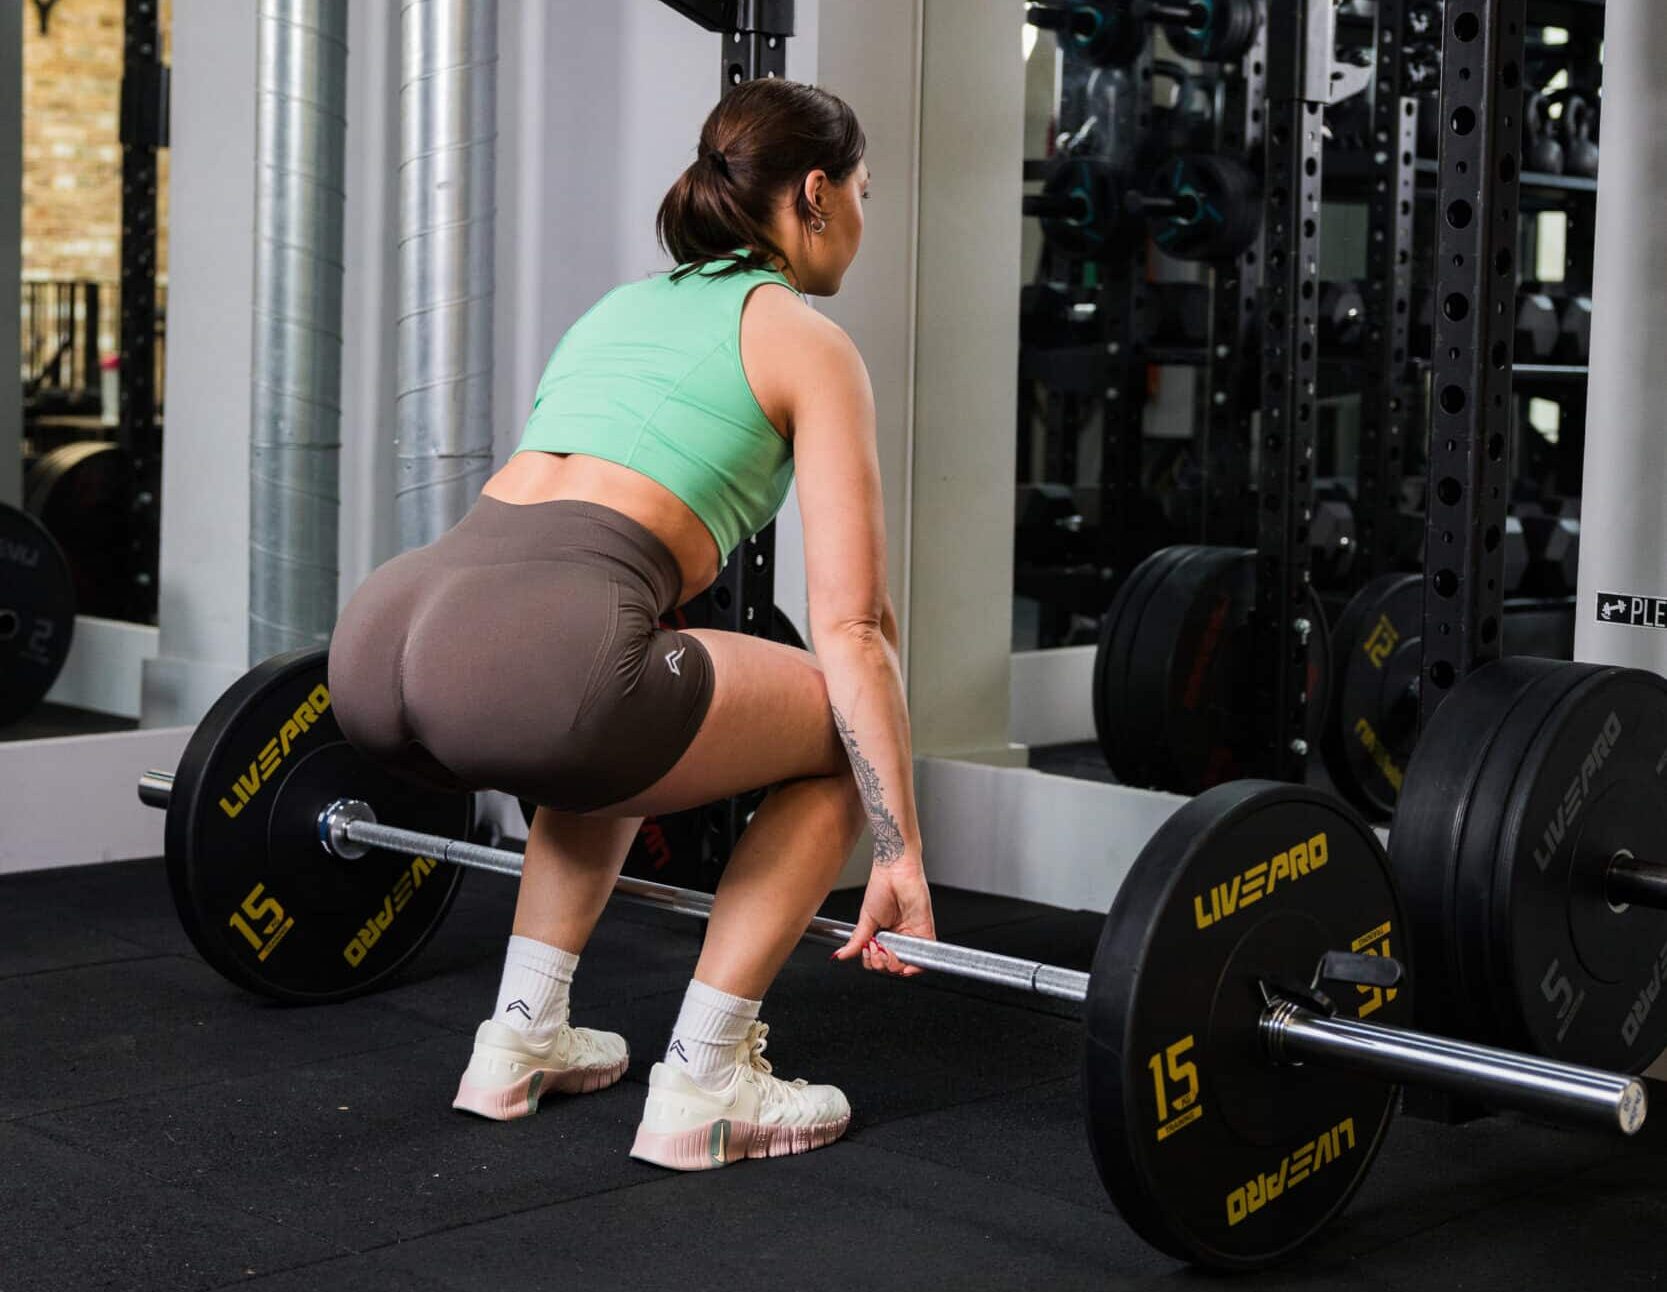
The Setup: Critical First Steps
Proper setup determines whether your deadlift is safe or dangerous.
Step 1: Bar Position
Place the barbell on the floor. Load plates (if using any) and secure with clips.
Stand with feet hip-width apart. The bar should be over the middle of your feet—approximately over your shoelaces. Not over your toes. Not mid-foot. Right over the laces.
This positioning ensures the bar travels in a straight vertical line when lifted.
Step 2: Grip the Bar
Hinge at your hips (push bum backward) and bend knees slightly until you can reach the bar.
Grip options:
Double overhand (both palms facing you): Best for beginners and lighter weights. Builds grip strength symmetrically.
Mixed grip (one palm facing you, one away): Allows heavier weights. More secure grip. Can create asymmetry if always using same hand positioning, so alternate which hand is which.
Hook grip: Advanced technique where thumb is trapped under fingers. Secure but uncomfortable initially.
Start with double overhand. When your grip fails before your legs/back, consider mixed grip or straps.
Grip width: Hands just outside your legs. Arms should hang straight down.
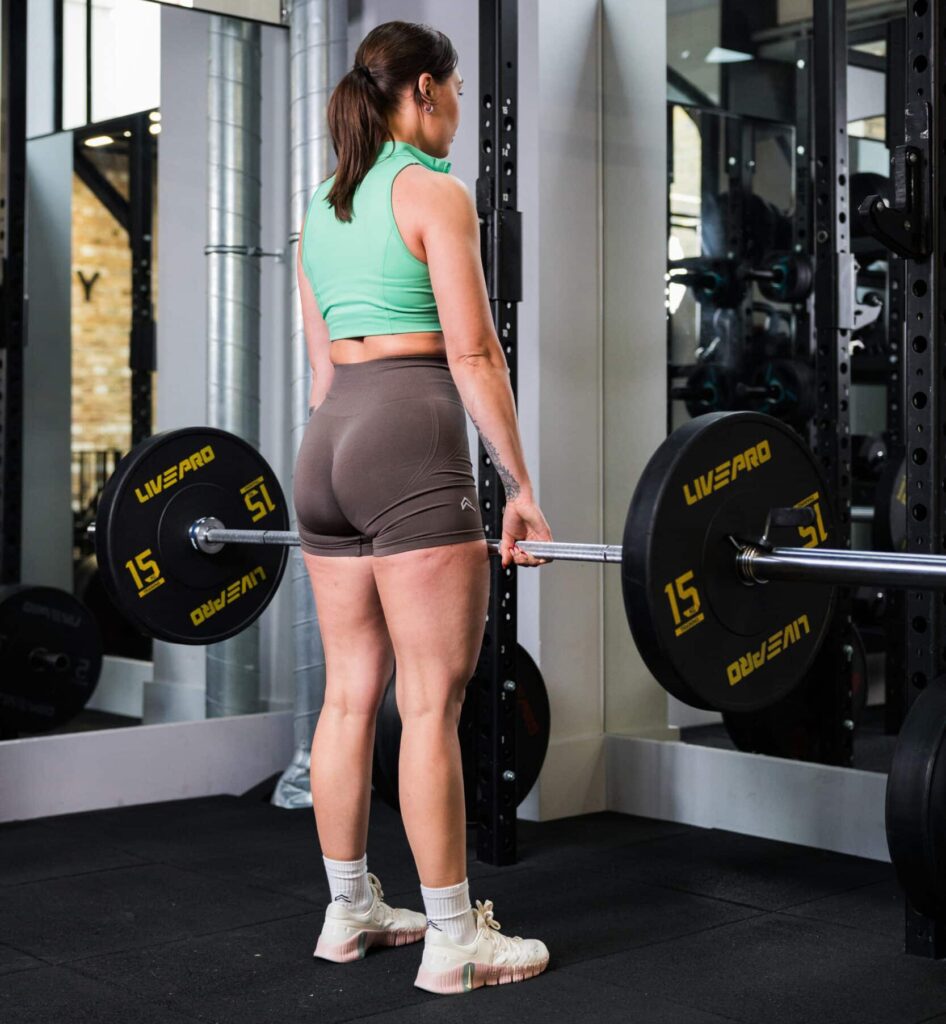
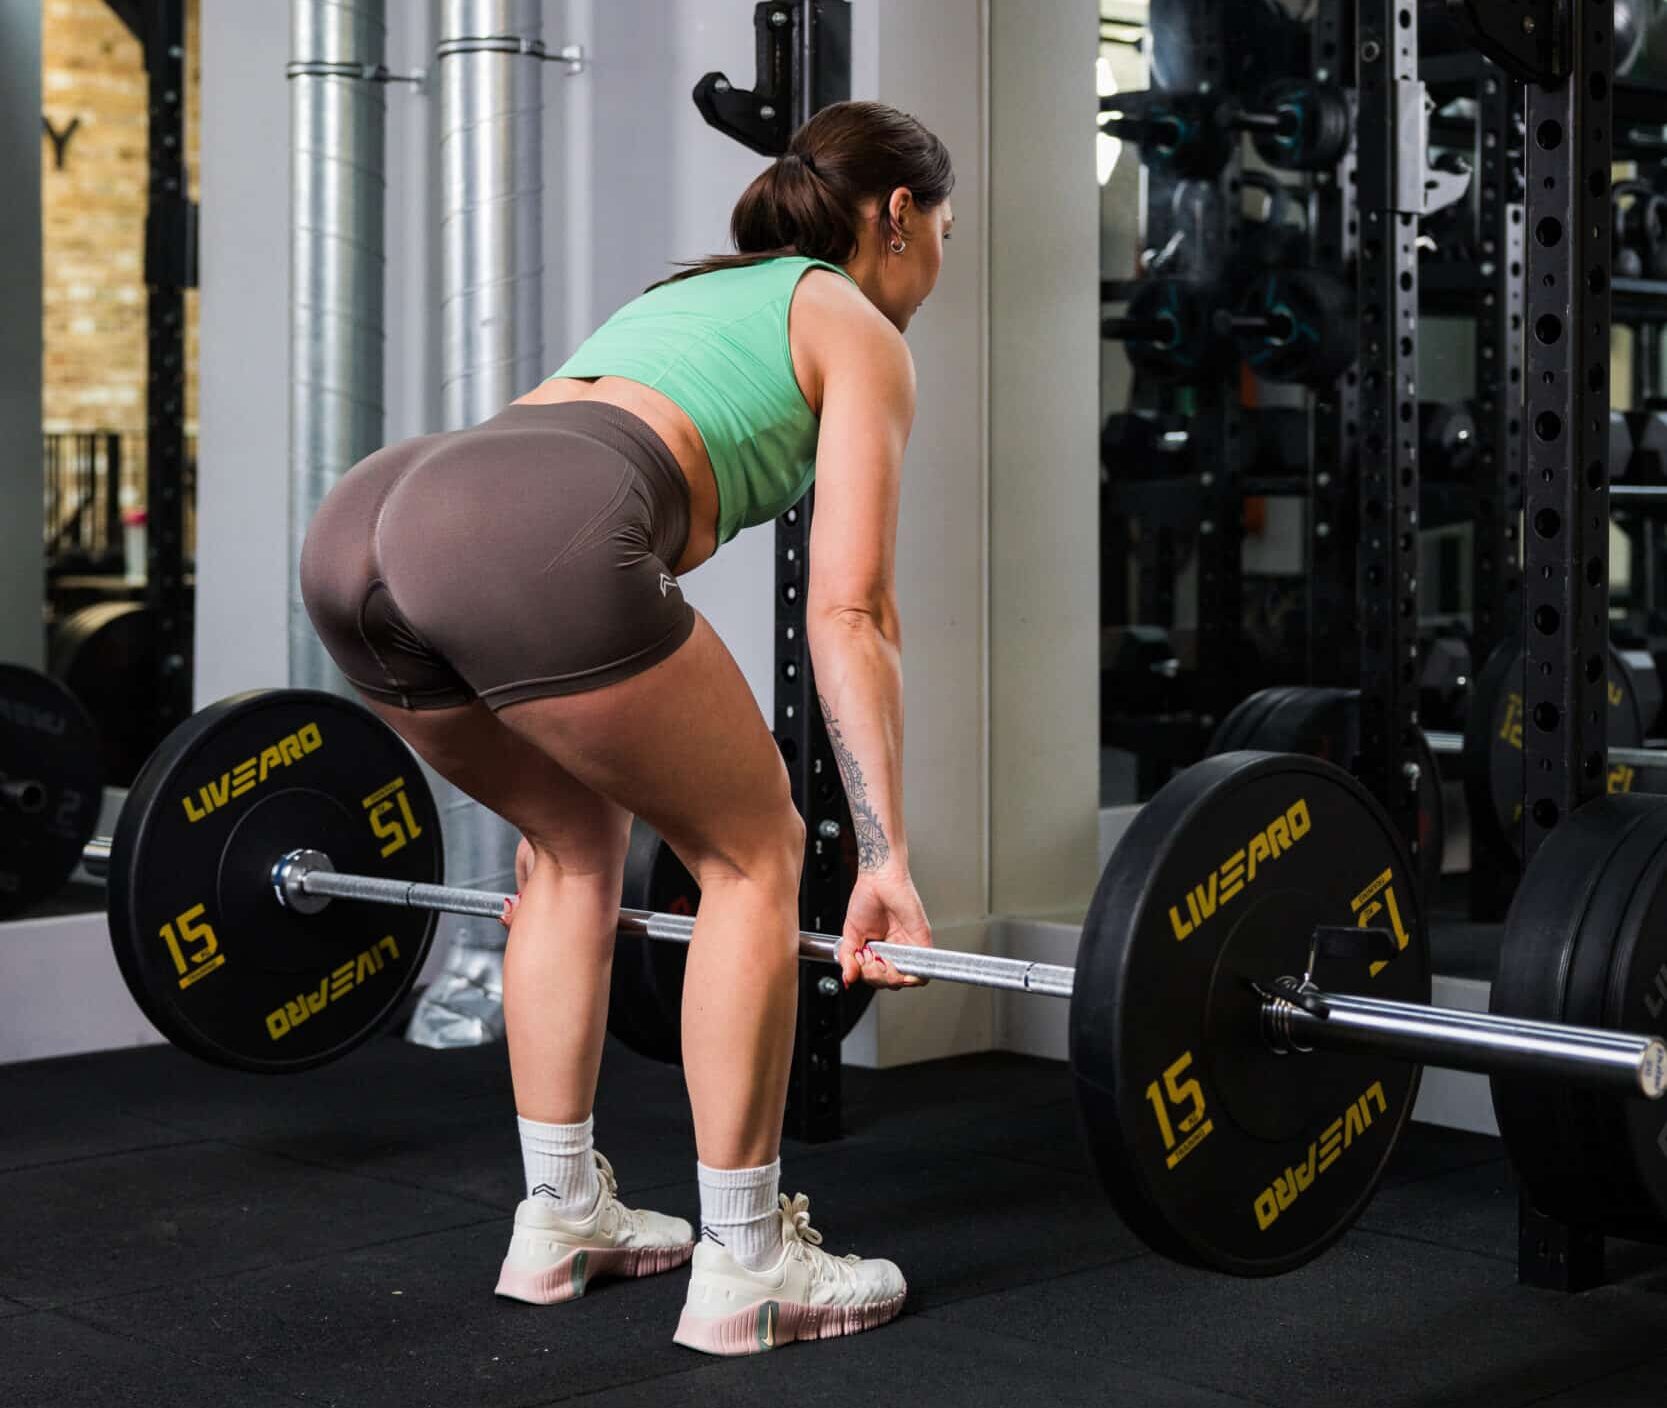
Step 3: Body Position Before the Lift
This is where most people get it wrong.
Feet: Hip-width apart, toes pointed slightly outward (10-15 degrees)
Shins: Should be nearly touching the bar. If bar moves forward when you pull, it was too far from shins.
Back: Completely neutral spine. Not rounded. Not excessively arched. Straight.
Shoulders: Directly over or slightly in front of the bar when viewed from the side
Chest: Up and proud. Imagine showing off a logo on your shirt.
Head/Neck: Neutral. Don’t crane neck upward. Your head follows your spine.
Core: Brace HARD. Take a deep breath into your belly, hold it, and brace your abs as if someone’s about to punch you.
This setup position is critical. Film yourself from the side. Check that your back is neutral and shoulders are over the bar.
The Lift: Execution Step-by-Step
Phase 1: The Pull (Breaking the Floor)
1. Create tension before moving the bar.
Before you actually lift, “take the slack out of the bar.” Pull upward just enough that the bar touches the plates but doesn’t leave the floor yet. Your arms should be straight and tense. You should feel loaded and ready.
This creates full-body tension before the actual lift.
2. Drive through your entire foot.
Don’t think about pulling with your back. Think about pushing the floor away with your feet. Leg press the ground.
3. The bar travels in a straight vertical line.
It should scrape your shins (wear long socks or trousers). If it moves forward, you lose power and strain your back.
4. Hips and shoulders rise together.
Common mistake: hips shoot up first whilst shoulders stay down. This puts all load on your lower back.
Correct movement: hips and shoulders rise at the same rate. Your back angle stays constant initially.
Phase 2: The Lockout
5. As bar passes your knees, drive hips forward.
Once the bar clears your knees, powerfully thrust your hips forward whilst squeezing your glutes hard.
Think: “hump the bar.” Crude but accurate. You’re finishing with hip extension, not by leaning backward.
6. Stand fully upright.
At the top:
- Hips fully extended (locked out)
- Knees fully extended (locked out)
- Shoulders back
- Chest proud
- Core still braced
Do NOT lean backward at the top. Just stand upright. Overextending your back is dangerous and unnecessary.
7. Hold for a second.
Control at the top demonstrates mastery. Don’t rush.
Phase 3: The Descent
8. Hinge hips backward first.
To lower the bar, push your hips backward first. The bar descends by hinging at hips, not by bending knees immediately.
9. Once bar passes knees, bend knees.
Bar travels straight down, close to your legs. Once it passes your knees, you can bend knees more to lower it to the floor.
10. Lower with control.
Don’t just drop it. Control the descent. Controlled eccentric builds strength and prevents injury.
11. Touch floor, reset, repeat.
Between reps, you can quickly reset your setup. Deadlifts are called “dead” lifts because the weight starts from a dead stop each rep. No bouncing.
Common Mistakes Women Make
Mistake 1: Rounding the Lower Back
The error: Back rounds like a scared cat during the lift.
Why it’s dangerous: Puts enormous strain on spinal discs. This is how people hurt their backs.
The fix: Start with lighter weight. Film yourself. If back rounds at all, reduce weight until you can maintain neutral spine throughout.
Mistake 2: Starting with Hips Too Low
The error: Treating deadlifts like a squat. Hips start very low, creating excessive knee bend.
Why it’s wrong: This makes it a squat, not a deadlift. Your quads do all the work instead of glutes and hamstrings.
The fix: Hips should be higher than knees but lower than shoulders at the start. Think hip hinge, not squat.
Mistake 3: Bar Too Far from Body
The error: Bar is over toes instead of mid-foot. Bar drifts forward during the lift.
Why it’s wrong: Creates massive leverage disadvantage. Strains lower back unnecessarily.
The fix: Set up with bar over shoelaces. During the lift, the bar should scrape your shins and thighs.
Mistake 4: Not Bracing Core
The error: Breathing normally throughout the lift without creating intra-abdominal pressure.
Why it’s dangerous: Your spine has no support. Increased injury risk dramatically.
The fix: Before each rep: big breath into belly, brace abs hard, lift, then breathe out at top. Repeat for next rep.
Mistake 5: Using Too Much Back, Not Enough Legs
The error: Thinking of it as a “back exercise” and trying to pull with your back.
Why it’s wrong: This creates lower back strain and reduces power.
The fix: Think “leg press the floor.” Your legs drive the movement. Back maintains position.
Mistake 6: Hyperextending at the Top
The error: Leaning backward at lockout, overarching lower back.
Why it’s wrong: Unnecessary stress on lower back. Doesn’t prove anything.
The fix: Stand upright. Hips and knees locked. Don’t lean back.
Mistake 7: Starting Too Heavy
The error: Trying to deadlift 60kg immediately because you saw someone else do it.
Why it’s wrong: Perfect technique is impossible with excessive weight.
The fix: Start with just the 20kg bar. Master technique. Add weight gradually.
Progressive Overload: How to Get Stronger
You start with a 20kg empty barbell. How do you progress to 60kg? 80kg? 100kg+?
Progressive overload strategy:
Phase 1: Perfect Technique (Weeks 1-4)
Start with empty 20kg bar.
Focus: Every rep should look identical. Film yourself. Perfect your setup, brace, pull, and descent.
Volume: 3-4 sets of 5 reps, twice weekly
Don’t add weight yet. Build perfect motor pattern.
Phase 2: Add Weight Gradually (Months 2-6)
Once technique is consistent, add weight.
Progression:
- Week 5: 30kg (bar + 5kg per side)
- Week 7: 40kg (bar + 10kg per side)
- Week 9: 50kg (bar + 15kg per side)
- Week 11: 60kg (bar + 20kg per side)
Add 5-10kg every 2 weeks whilst maintaining perfect form.
If form degrades, stay at that weight longer.
Phase 3: Structured Programmes (Month 7+)
For strength (lower reps, heavier weight):
- 4-5 sets of 3-5 reps
- 2x weekly
- 80-90% of your max
For muscle building (moderate reps, moderate weight):
- 3-4 sets of 6-10 reps
- 2x weekly
- 70-80% of your max
Realistic progression timeline for women training consistently:
Month 3: 40-50kg Month 6: 60-70kg Month 12: 80-90kg Month 18-24: 100kg+
These are averages. Some progress faster. Some slower. Both are fine.
I trained a woman who deadlifted 20kg initially. Twenty months later, she pulled 105kg. She was 62 years old. Age is less limiting than you think.
Variations to Consider
Romanian Deadlift (RDL)
Start at the top (standing with bar). Lower bar down front of legs by hinging at hips. Stop when you feel hamstring stretch (typically mid-shin). Return to top.
Benefits: Emphasises hamstrings more. Easier to learn than conventional. Great for building posterior chain.
Good for: Beginners or those with mobility limitations.
Sumo Deadlift
Wider stance (feet outside shoulder-width). Toes pointed out more (30-45 degrees). Grip bar with hands inside your legs.
Benefits: More upright torso position. Less lower back involvement. More quad and inner thigh activation.
Good for: Those with long legs or back issues. Personal preference.
Trap Bar Deadlift
Use hexagonal trap bar (if gym has one). Stand inside the bar. Grip handles at sides.
Benefits: More upright position. Easier on lower back. Allows heavier weights for many people.
Good for: Beginners learning hip hinge. Those with back concerns.

Programming Deadlifts
Frequency: 1-2x weekly
Deadlifts are taxing. Unlike bench press or squats, most people shouldn’t deadlift 3+ times weekly. Recovery matters.
Sample programme:
Monday (Heavy):
- Deadlifts: 4 sets × 3-5 reps (85-90% max)
- Romanian deadlifts: 3 sets × 8 reps (lighter)
- Supporting work: back rows, core
Thursday (Moderate):
- Romanian deadlifts: 4 sets × 8-10 reps
- Bulgarian split squats: 3 sets × 10 per leg
- Supporting work: hip thrusts, hamstring curls
This provides two deadlift stimulus sessions weekly without excessive fatigue.
Troubleshooting Issues
“My Lower Back Hurts After Deadlifts”
Possible causes:
- Back is rounding during lift
- Not bracing core properly
- Using too much weight
- Bar too far from body
Solutions:
- Film yourself. Check back position
- Reduce weight significantly
- Practice bracing technique
- Ensure bar stays close to legs
If pain persists, see a physiotherapist. Deadlifts shouldn’t cause pain.
“My Grip Fails Before My Legs/Back”
Solution: Use mixed grip or lifting straps. Don’t let grip limit leg/back training.
Separately, train grip: farmer’s carries, dead hangs.
“I Can’t Reach the Bar on the Floor”
Cause: Limited hip mobility.
Solution: Elevate the bar on plates or boxes. As mobility improves, lower the starting height gradually.
Separately, work on hip mobility: hip flexor stretches, hamstring work.
“One Side Feels Stronger”
Cause: Natural asymmetry.
Solution: Film from front. Ensure bar lifts evenly. Don’t let strong side dominate. This will balance over time.
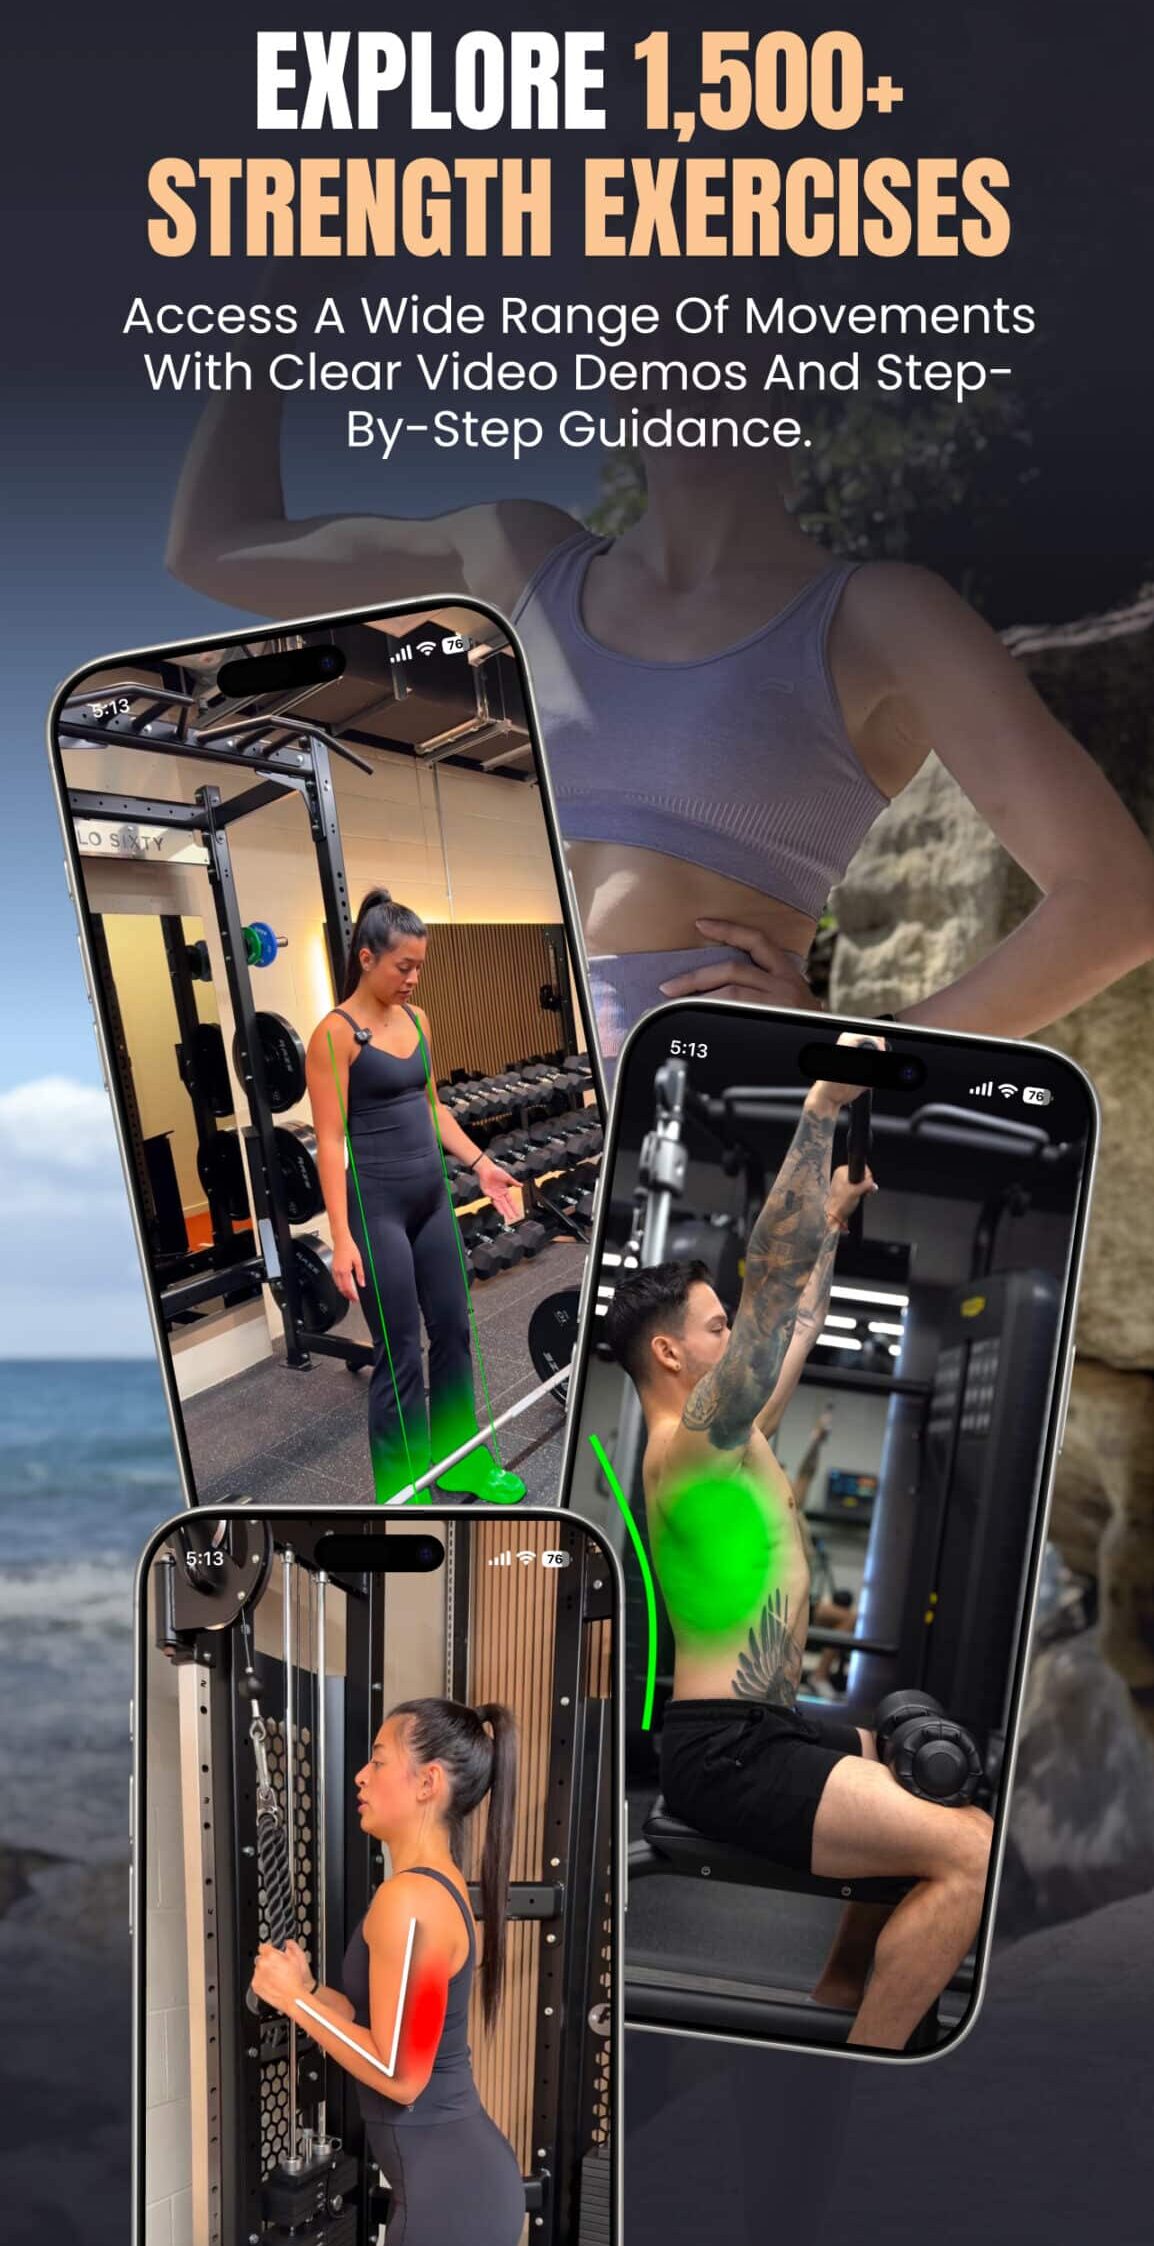
How 12REPS Helps with Deadlifts
Deadlifts require precise programming:
- Enough volume to build strength
- Enough recovery to prevent injury
- Gradual progression that challenges without overwhelming
12REPS handles this automatically:
Progressive overload tracking: The app knows when to add weight based on your performance. You don’t guess.
Deload weeks: The app programmes lighter weeks periodically so you don’t burn out.
Form reminders: Video demonstrations before every session ensure technique doesn’t degrade.
Balance with other lifts: The app ensures deadlifts fit properly within your overall programme alongside squats, presses, and other movements.
For women training at home and gym, the app can substitute trap bar deadlifts (gym) with Romanian deadlifts (home with dumbbells) whilst maintaining training stimulus.
The Bottom Line
The deadlift is the single best exercise for building full-body strength.
Proper technique:
- Bar over mid-foot (shoelaces)
- Hip hinge to grip bar
- Neutral spine, shoulders over bar, chest proud
- Brace core hard
- Drive floor away with feet
- Hips and shoulders rise together
- Lock out by thrusting hips forward, squeezing glutes
- Lower with control
Progressive overload:
- Start with 20kg empty bar
- Perfect technique for 4 weeks
- Add 5-10kg every 2 weeks whilst maintaining form
- Expect 20kg → 80-100kg over 12-18 months
Common mistakes to avoid:
- Rounding lower back
- Starting with hips too low (squatting it)
- Letting bar drift forward
- Not bracing core
- Trying to pull with back instead of driving with legs
Women who deadlift consistently are noticeably stronger in everything else. Better squat strength. Better hip thrust strength. Better posture. Better confidence.
The deadlift isn’t just an exercise. It’s proof that you’re capable of more than you thought.
Start with the empty bar. Film yourself. Perfect the technique. Add weight gradually. Twelve months from now, you’ll be lifting weights that currently seem impossible.
And you’ll feel unstoppable.
References
- Swinton, P.A., Stewart, A., Agouris, I., Keogh, J.W. and Lloyd, R. (2011). A Biomechanical Analysis of Straight and Hexagonal Barbell Deadlifts Using Submaximal Loads. Journal of Strength and Conditioning Research, 25(7), pp.2000-2009. https://doi.org/10.1519/JSC.0b013e3181e73f87
- McGuigan, M.R. and Wilson, B.D. (1996). Biomechanical Analysis of the Deadlift. Journal of Strength and Conditioning Research, 10(4), pp.250-255.
- Cholewicki, J., McGill, S.M. and Norman, R.W. (1991). Lumbar Spine Loads During the Lifting of Extremely Heavy Weights. Medicine and Science in Sports and Exercise, 23(10), pp.1179-1186.
- Hales, M. (2010). Improving the Deadlift: Understanding Biomechanical Constraints and Physiological Adaptations to Resistance Exercise. Strength and Conditioning Journal, 32(4), pp.44-51. https://doi.org/10.1519/SSC.0b013e3181e5e300
- Bird, S.P. and Barrington-Higgs, B. (2010). Exploring the Deadlift. Strength and Conditioning Journal, 32(2), pp.46-51. https://doi.org/10.1519/SSC.0b013e3181d59582
- Escamilla, R.F., Francisco, A.C., Kayes, A.V., Speer, K.P. and Moorman, C.T. (2002). An Electromyographic Analysis of Sumo and Conventional Style Deadlifts. Medicine and Science in Sports and Exercise, 34(4), pp.682-688. https://doi.org/10.1097/00005768-200204000-00019
- Camara, K.D., Coburn, J.W., Dunnick, D.D., Brown, L.E., Galpin, A.J. and Costa, P.B. (2016). An Examination of Muscle Activation and Power Characteristics While Performing the Deadlift Exercise With Straight and Hexagonal Barbells. Journal of Strength and Conditioning Research, 30(5), pp.1183-1188. https://doi.org/10.1519/JSC.0000000000001352