

You’re in the gym. The programme says “lunges.” You step forward, lower down, push back up. Your front knee shoots past your toes. Your back knee crashes into the floor. Something feels wrong but you’re not sure what.
Welcome to the most commonly butchered exercise in the gym.
Here’s what usually happens: you’ve seen lunges performed countless times, they look simple, so you just start doing them. Three weeks later, your knees hurt, your balance is terrible, and you’re wondering why such a “basic” exercise feels impossibly awkward.
The problem isn’t that you’re uncoordinated—it’s that nobody ever taught you proper lunge technique.
I’m Will Duru, a personal trainer with over 10 years’ experience in London. I’ve coached hundreds of women through proper lunge technique, fixing the same mistakes repeatedly.
This guide explains exactly how to perform forward, reverse, and walking lunges with proper form, which variation to start with (hint: not forward lunges), common mistakes that wreck your knees, and how to progress from bodyweight to weighted lunges safely.
Why Lunges Matter
Lunges are one of the most functional lower-body exercises you can perform.
What lunges develop:
- Quadriceps (front thigh)
- Glutes (buttocks)
- Hamstrings (back thigh)
- Calves
- Core stability (maintaining upright posture)
- Balance and coordination (single-leg work)
Why functional? Lunges mimic real-life movement patterns—stepping up stairs, getting up from the floor, walking, running—more closely than bilateral exercises like squats. You move through space on one leg at a time, just like in daily life.
Additional benefits:
- Identifies and corrects left-right strength imbalances
- Develops hip mobility and flexibility
- Builds single-leg stability crucial for injury prevention
- Can be performed anywhere (bodyweight variation requires no equipment)
Research shows unilateral exercises like lunges improve balance and reduce injury risk more effectively than bilateral exercises alone, particularly for knee and ankle stability.
The Three Main Lunge Variations: Which to Start With?
Before diving into technique, understand that not all lunges are created equal—and the “obvious” starting point (forward lunges) is actually the hardest variation.
Reverse Lunges (Start Here)
Difficulty: Easiest Best for: Beginners, anyone with knee concerns, learning proper lunge mechanics
Why start here:
- Your front foot stays planted throughout (more stable base)
- Easier to control knee position (less likely to let knee track past toes)
- Less impact on knee joint (stepping backward is gentler than decelerating forward momentum)
- More hamstring and glute emphasis (beneficial for most women)
My recommendation: Master reverse lunges for 4-6 weeks before attempting forward lunges.
Forward Lunges (Progress to This)
Difficulty: Moderate-Hard Best for: Once reverse lunges feel comfortable, adding variety, building more quadricep emphasis
Why more difficult:
- Dynamic movement (stepping forward creates momentum you must control)
- Less stable (front foot landing position less predictable)
- Greater knee stress (deceleration forces when landing)
- Requires better balance and coordination
When to attempt: After you can perform 3 sets of 10 reverse lunges per leg with perfect form.
Walking Lunges (Advanced Variation)
Difficulty: Hardest Best for: Intermediate-advanced trainees, building cardio-strength endurance, adding variety
Why most difficult:
- Continuous movement without rest
- Greatest balance and coordination demand
- Requires space and confidence
- Most fatiguing (no resetting between reps)
When to attempt: After you can perform both reverse and forward lunges comfortably with proper form.
Reverse Lunge: Complete Technique Breakdown
Start here. Seriously.
Setup
Starting position:
- Feet hip-width apart (imagine standing on railway tracks, not a tightrope)
- Weight distributed evenly across both feet
- Posture upright: chest up, shoulders back, core engaged
- Hands on hips or by sides (wherever feels natural)
- Eyes looking forward, not down at your feet
The Movement (Right Leg Example)
Step 1: The step back
- Take a step backward with your RIGHT leg
- Step distance: approximately 1.5x your normal stride length
- Land on the ball of your right foot (heel stays elevated)
- Keep your left foot completely flat on the ground
Step 2: The descent
- Lower your body straight down (think: lift going down)
- Continue until your right knee hovers 2-5cm above the floor
- Your left thigh should be roughly parallel to the floor (90-degree angle at knee)
- Your left shin should be vertical (knee directly over ankle)
- Maintain upright torso throughout (resist leaning forward)
Step 3: The ascent
- Push through your LEFT heel (front foot) to stand back up
- Drive your right foot forward, returning to starting position
- Maintain control—don’t bounce or use momentum
Step 4: Repeat
- Complete all reps on one side, then switch
- OR alternate legs (both work, choose preference)
Key Form Points
Front leg (the one staying planted):
✅ Entire foot stays flat on floor
✅ Knee tracks in line with toes (not collapsing inward)
✅ Shin remains vertical
✅ Knee positioned directly over ankle at bottom position
✅ Weight distributed through mid-foot and heel
Back leg (the one stepping back):
✅ Heel stays elevated (on ball of foot)
✅ Knee lowers straight down toward floor
✅ Don’t crash knee into floor—control the descent
✅ Aim for 2-5cm clearance from floor
Torso:
✅ Upright throughout movement
✅ Slight forward lean acceptable (10-15 degrees) but avoid excessive lean
✅ Shoulders stay back and down (not rounded forward)
✅ Core engaged throughout (brace your abs)
Hips:
✅ Stay level (don’t let one hip drop lower than other)
✅ Face straight forward (no rotation)
✅ Maintain neutral pelvis (don’t anteriorly tilt)
Breathing Pattern
Inhale: During the descent (lowering phase) Exhale: During the ascent (pushing back to standing)
Or simply breathe naturally—don’t hold your breath.
Starting Weights and Progression
Complete beginner (0-3 months training):
- Weeks 1-4: Bodyweight only, 3 sets of 8-10 reps per leg
- Weeks 5-8: Hold 2-4kg dumbbells, 3 sets of 10-12 reps per leg
- Weeks 9-12: Progress to 4-8kg dumbbells, 3 sets of 10-12 reps per leg
Intermediate (3-12 months training):
- Start with 6-10kg dumbbells
- Progress to 12-16kg over 8-12 weeks
- 3-4 sets of 10-12 reps per leg
How to hold dumbbells:
- One dumbbell in each hand, arms hanging by your sides
- Neutral grip (palms facing inward toward your legs)
- Keep shoulders back—don’t let weights pull you forward
Common Mistakes
Mistake 1: Knee collapsing inward (knee valgus)
Your front knee caves inward toward the midline as you lower down.
Why problematic: Creates excessive stress on knee ligaments, particularly the ACL. Increases injury risk.
Fix: Actively push your front knee slightly outward as you descend. Think: “knee tracks over second toe.” If this is difficult, reduce weight or depth until you can control knee position.
Mistake 2: Front knee shooting forward past toes
As you lower, your front knee travels significantly forward past your toes, causing your heel to lift.
Why problematic: Increases shearing forces on knee joint and patellar tendon. Reduces glute activation.
Fix: Step back further with your rear leg. Focus on sitting your hips straight down rather than forward. Keep your front shin vertical.
Mistake 3: Torso leaning excessively forward
Your upper body tilts forward dramatically as you lower, looking more like a “good morning” than a lunge.
Why problematic: Reduces quad and glute activation. Places excessive stress on lower back. Usually indicates weak core or poor mobility.
Fix: Engage your core before each rep. Think “chest stays proud and up.” Record yourself from the side to check torso angle. If you can’t maintain upright posture, reduce depth or weight.
Mistake 4: Back knee crashing into floor
You lower down explosively and your back knee slams into the floor with force.
Why problematic: Painful, bruising, and indicates lack of control.
Fix: Slow down the descent. Count “2 seconds down” in your head. Stop descent 2-5cm before knee touches floor. Consider using a yoga mat for extra cushioning whilst you develop control.
Mistake 5: Narrow stance (tightrope walking)
Your feet are positioned as if walking on a tightrope rather than railway tracks—very narrow base.
Why problematic: Extremely unstable. Requires excessive balance work rather than strength work. Makes proper form nearly impossible.
Fix: Start with feet hip-width apart. When stepping back, maintain this hip-width spacing. Your feet should never be in a single straight line.
Mistake 6: Pushing off back foot to return
You use your back leg to push yourself forward, rather than using your front leg to stand up.
Why problematic: Reduces training stimulus on working leg (front leg). Teaches poor movement pattern.
Fix: Think “drive through front heel.” Your back leg is just balancing—all the work should come from your front leg pushing into the ground to stand.
Forward Lunge: Complete Technique Breakdown
Only attempt once reverse lunges feel comfortable.
Setup
Starting position:
- Feet hip-width apart
- Weight evenly distributed
- Upright posture
- Hands on hips (easier for balance) or by sides
The Movement (Right Leg Example)
Step 1: The step forward
- Take a step forward with your RIGHT leg
- Step distance: approximately 1.5-2x normal stride length
- Land heel-first, rolling through to full foot contact
- Keep your left foot planted (heel may lift slightly—that’s normal)
Step 2: The descent
- Lower your body straight down
- Continue until your right thigh is parallel to floor
- Your left knee should hover 2-5cm above floor
- Your right shin should be vertical (knee over ankle)
- Maintain upright torso
Step 3: The ascent
- Push through your RIGHT heel (front foot) to drive back
- Powerfully push yourself backward to starting position
- Your right foot returns to starting position next to left foot
- Stand fully upright between reps
Step 4: Repeat
- Alternate legs or complete all reps on one side, then switch
Key Differences from Reverse Lunges
More dynamic: You must control forward momentum when landing, making balance more challenging.
Front foot placement critical: Harder to “correct” mid-rep if you step too far or not far enough.
Greater deceleration forces: Your front leg must slow your body’s forward motion, creating more knee stress.
Quad emphasis: Forward lunges emphasize quadriceps slightly more than reverse lunges.
Common Mistakes (Specific to Forward Lunges)
Mistake 1: Stepping too short
Your step forward is too small, causing your knee to shoot forward past your toes as you lower.
Fix: Step farther forward. When you lower down, your front shin should be vertical. If your knee is past your toes, you need a longer step.
Mistake 2: Momentum-driven descent
You step forward and drop down rapidly, using momentum rather than control.
Fix: Slow down. Step forward, pause briefly to establish balance, then controlled descent. Count 2 seconds down.
Mistake 3: Difficulty returning to start
You struggle to push yourself back to starting position, often using your back leg to help.
Fix: Push explosively through your front heel. If this is extremely difficult, you’re either stepping too far forward, using too much weight, or not ready for forward lunges yet. Return to reverse lunges.
Walking Lunge: Complete Technique Breakdown
The ultimate lunge variation. Only attempt when both forward and reverse lunges feel comfortable.
Setup
Starting position:
- Clear space: You need 10-15 meters of space to walk forward
- Feet hip-width apart
- Upright posture
- Dumbbells in hands (or bodyweight if learning)
The Movement
Step 1: First lunge
- Step forward with right leg (same as forward lunge)
- Lower into lunge position
- Right thigh parallel to floor, left knee hovering above floor
Step 2: The transition (key difference)
- Instead of pushing back to starting position…
- Drive powerfully through your right heel
- Bring your left leg forward to step into the next lunge
- Your left foot lands ahead of you (where your right foot was)
Step 3: Continue
- Immediately lower into the next lunge (left leg now forward)
- Repeat: alternate legs whilst continuously moving forward
- Each forward step = 1 rep
Key Points
Continuous movement: No pausing between reps. This is why it’s more fatiguing.
Balance challenge: You never return to a stable two-foot position until the set ends.
Core work: Maintaining upright posture whilst constantly moving requires significant core engagement.
Space required: Find an empty corridor, basketball court, or section of gym with minimal traffic.
Variations
Walk-and-reset: After each lunge, bring your back foot forward to standing, pause briefly, then step into next lunge. Easier version—good for learning.
Continuous walking: No pause between reps. More challenging, better for conditioning.
Programming Recommendation
Walking lunges for reps: Challenging to count. Instead, measure by distance or time.
Distance-based: 3 sets of 15-20 meters Time-based: 3 sets of 30-45 seconds
Lunge Programming Guidelines
Frequency
How often: 1-2 times per week
In which workouts: Any lower body or full body session
Volume per session: 3-4 sets total (all variations combined)
Placement in Workout
Option 1 (strength focus): Perform lunges early, after main compound lifts (squats/deadlifts)
Example order:
- Squats: 4 sets
- Romanian Deadlifts: 3 sets
- Reverse Lunges: 3 sets of 10 per leg
- Leg Curls: 3 sets
- Calf Raises: 3 sets
Option 2 (hypertrophy focus): Perform lunges mid-workout as primary leg exercise
Example order:
- Goblet Squats: 3 sets (lighter, for activation)
- Reverse Lunges: 4 sets of 12 per leg (primary exercise)
- Hip Thrusts: 3 sets
- Leg Extensions: 3 sets
Option 3 (conditioning focus): Walking lunges as finisher
Example: 3 sets of 30 meters walking lunges at end of workout
Sets and Reps
Strength (heavy weight, lower reps):
- 3-4 sets of 6-8 reps per leg
- Rest: 2-3 minutes between sets
- Weight: Challenging but controlled
Hypertrophy (moderate weight, moderate reps):
- 3-4 sets of 10-12 reps per leg
- Rest: 90 seconds-2 minutes
- Weight: Should feel challenging by rep 10
Muscular endurance (lighter weight, high reps):
- 2-3 sets of 15-20 reps per leg
- Rest: 60-90 seconds
- Weight: Lighter, focus on volume
Progression Strategy
Phase 1 (Weeks 1-4): Master bodyweight reverse lunges
- 3 sets of 8 reps per leg
- Focus entirely on form
- No added weight
Phase 2 (Weeks 5-8): Add light weight to reverse lunges
- 3 sets of 10 reps per leg
- 4-8kg dumbbells
- Maintain perfect form
Phase 3 (Weeks 9-12): Increase weight, introduce forward lunges
- Reverse lunges: 3 sets of 12 reps per leg, 8-12kg dumbbells
- Forward lunges: 2 sets of 8 reps per leg, bodyweight only
Phase 4 (Weeks 13-16): Progress both variations
- Reverse lunges: 4 sets of 12 reps, 12-16kg dumbbells
- Forward lunges: 3 sets of 10 reps, 6-10kg dumbbells
Phase 5 (Weeks 17+): Introduce walking lunges
- Reverse lunges: 3 sets of 10 reps, 16-20kg dumbbells
- Walking lunges: 2 sets of 15 meters, 8-12kg dumbbells

Additional Lunge Variations
Once you’ve mastered the basics, these variations add variety and challenge specific muscles differently.
Goblet Lunge
How: Hold a single dumbbell or kettlebell at chest height (goblet position) whilst performing lunges.
Benefit: Weight position increases core engagement and keeps torso more upright naturally.
When to use: Alternative to holding dumbbells by your sides, especially useful if torso lean is problematic.
Deficit Reverse Lunge
How: Stand on a platform (10-20cm height), perform reverse lunge with back foot lowering to floor.
Benefit: Increases range of motion, greater glute and quad stretch.
When to use: Advanced progression once standard reverse lunges feel too easy even with heavy weight.
Bulgarian Split Squat (Elevated Rear Foot)
How: Place back foot on bench (30-50cm height), perform lunge with nearly all weight on front leg.
Benefit: Brutal single-leg exercise, maximum strength development.
When to use: Advanced trainees wanting to build serious single-leg strength. This is significantly harder than standard lunges.
Lateral Lunge
How: Instead of stepping forward or back, step to the side.
Benefit: Trains movement in frontal plane, emphasises adductors (inner thigh) and glute medius.
When to use: Adding variety, addressing specific weaknesses, sports-specific training.
Curtsy Lunge
How: Step your right leg diagonally behind and across your left leg (like a curtsy), then lower into lunge.
Benefit: Greater glute medius activation, hip external rotation work.
When to use: Glute emphasis, adding variety to training.
Troubleshooting Common Issues
“My knees hurt when I lunge.”
Possible causes:
- Knee tracking past toes (front leg)
- Knee collapsing inward
- Insufficient warm-up
- Pre-existing knee issues
Solutions:
- Film yourself from the side—check shin angle
- Focus on knee position (tracking over second toe)
- Perform thorough warm-up (10 minutes cardio + dynamic stretches)
- Try reverse lunges instead of forward (gentler on knees)
- Reduce depth (don’t lower as far)
- Reduce or eliminate weight
- If pain persists: Consult physiotherapist
“I can’t balance—I’m wobbling everywhere.”
This is normal when learning lunges. Balance improves with practice.
Strategies:
- Start with split squat (static position, no stepping)
- Hold wall or chair for balance whilst learning
- Ensure feet are hip-width apart (not narrow stance)
- Slow down the movement
- Look straight ahead (not down at feet)
- Practice single-leg balance exercises separately
Timeline: Most people develop adequate balance within 2-4 weeks of consistent practice.
“My back leg feels much weaker than my front leg.”
This is incredibly common. Most people have a 5-15% strength difference between legs.
Solutions:
- Start sets with weaker leg
- Perform extra set on weaker side if imbalance is significant
- Ensure you’re pushing through front heel (not using back leg to help)
- Continue training—imbalances typically reduce over 8-12 weeks
“I feel this mostly in my quads, not glutes.”
This often indicates:
- Torso too upright (more upright = more quad)
- Insufficient step length (too short = more quad)
- Knees tracking too far forward
To increase glute emphasis:
- Slight forward torso lean (10-15 degrees) increases glute/hamstring activation
- Longer step length
- Focus on “sitting back” into the lunge rather than “down”
- Try reverse lunges (naturally more glute-dominant)
How 12REPS Helps With Lunges
Understanding lunge technique is one thing. Actually incorporating lunges into a structured programme with appropriate volume, progression, and exercise combinations is another.
12REPS provides:
1. Proper programming: Lunges programmed at appropriate frequency (1-2x weekly) with suitable sets/reps for your experience level.
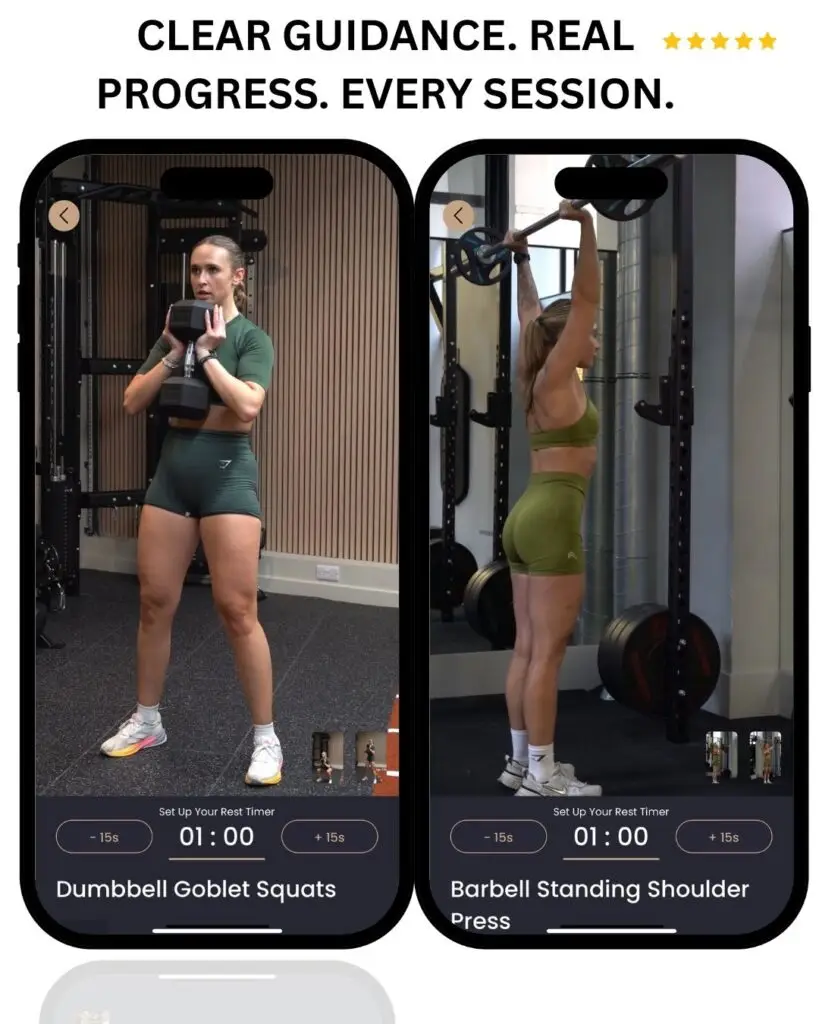
2. Exercise demonstrations: Video demonstrations of every lunge variation showing proper form from multiple angles.
3. Progressive difficulty: App automatically progresses you from bodyweight to weighted lunges as you build strength.
4. Balanced programming: Lunges combined with complementary exercises (squats, deadlifts, hip thrusts) for complete lower body development.
5. Equipment flexibility: Program adapts if you only have bodyweight (walking lunges), dumbbells (dumbbell lunges), or full gym equipment (all variations).
Try 12REPS free for 7 days. Stop guessing which exercises to perform and how to progress—follow a structured programme designed by qualified trainers.
The Bottom Line
Lunges are one of the most effective lower-body exercises, but only if performed with proper technique.
Start with reverse lunges:
✅ Easier to control form
✅ More stable
✅ Gentler on knees
✅ Master these before attempting forward or walking lunges
Critical form points:
✅ Hip-width stance (not narrow)
✅ Front shin stays vertical
✅ Knee tracks over toes (not collapsing inward)
✅ Torso stays upright
✅ Control the descent (don’t drop down rapidly)
Progression timeline:
✅ Weeks 1-4: Bodyweight reverse lunges
✅ Weeks 5-8: Weighted reverse lunges
✅ Weeks 9-12: Introduce forward lunges
✅ Weeks 13+: Add walking lunges when ready
Common mistakes to avoid:
❌ Knee shooting forward past toes
❌ Knee collapsing inward
❌ Narrow stance
❌ Back knee crashing into floor
❌ Using momentum instead of control
If you’re struggling with lunges, the issue is usually:
- Starting with forward lunges (too advanced)
- Stance too narrow
- Rushing the movement
- Attempting to add weight too soon
Solution: Go back to bodyweight reverse lunges. Master the pattern. Build strength. Progress patiently.
The women who build the strongest, most functional legs aren’t those who rush into heavy walking lunges immediately—they’re those who spend 6-12 weeks perfecting reverse lunge form before progressing to more challenging variations.
Patience with progression prevents knee pain and builds a solid foundation for years of productive training.
References
- McCurdy, K., O’Kelley, E., Kutz, M., Langford, G., Ernest, J. and Torres, M. (2010). Comparison of Lower Extremity EMG Between the 2-Leg Squat and Modified Single-Leg Squat in Female Athletes. Journal of Sport Rehabilitation, 19(1), pp.57-70. https://doi.org/10.1123/jsr.19.1.57
- Myer, G.D., Ford, K.R., Brent, J.L. and Hewett, T.E. (2006). The Effects of Plyometric vs. Dynamic Stabilization and Balance Training on Power, Balance, and Landing Force in Female Athletes. Journal of Strength and Conditioning Research, 20(2), pp.345-353. https://doi.org/10.1519/R-17955.1
- Riemann, B.L., Lapinski, S., Smith, L. and Davies, G. (2012). Biomechanical Analysis of the Anterior Lunge During 4 External-Load Conditions. Journal of Athletic Training, 47(4), pp.372-378. https://doi.org/10.4085/1062-6050-47.4.16
- Farrokhi, S., Pollard, C.D., Souza, R.B., Chen, Y.J., Reischl, S. and Powers, C.M. (2008). Trunk Position Influences the Kinematics, Kinetics, and Muscle Activity of the Lead Lower Extremity During the Forward Lunge Exercise. Journal of Orthopaedic & Sports Physical Therapy, 38(7), pp.403-409. https://doi.org/10.2519/jospt.2008.2634
- Jönhagen, S., Ericson, M.O., Németh, G. and Eriksson, E. (1996). Amplitude and Timing of Electromyographic Activity During Sprinting. Scandinavian Journal of Medicine & Science in Sports, 6(1), pp.15-21. https://doi.org/10.1111/j.1600-0838.1996.tb00065.x