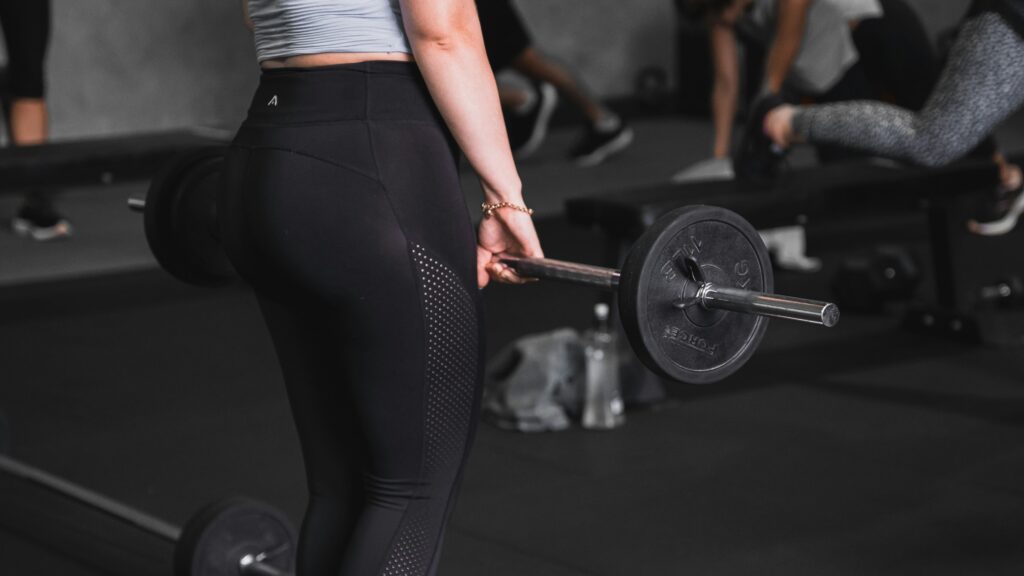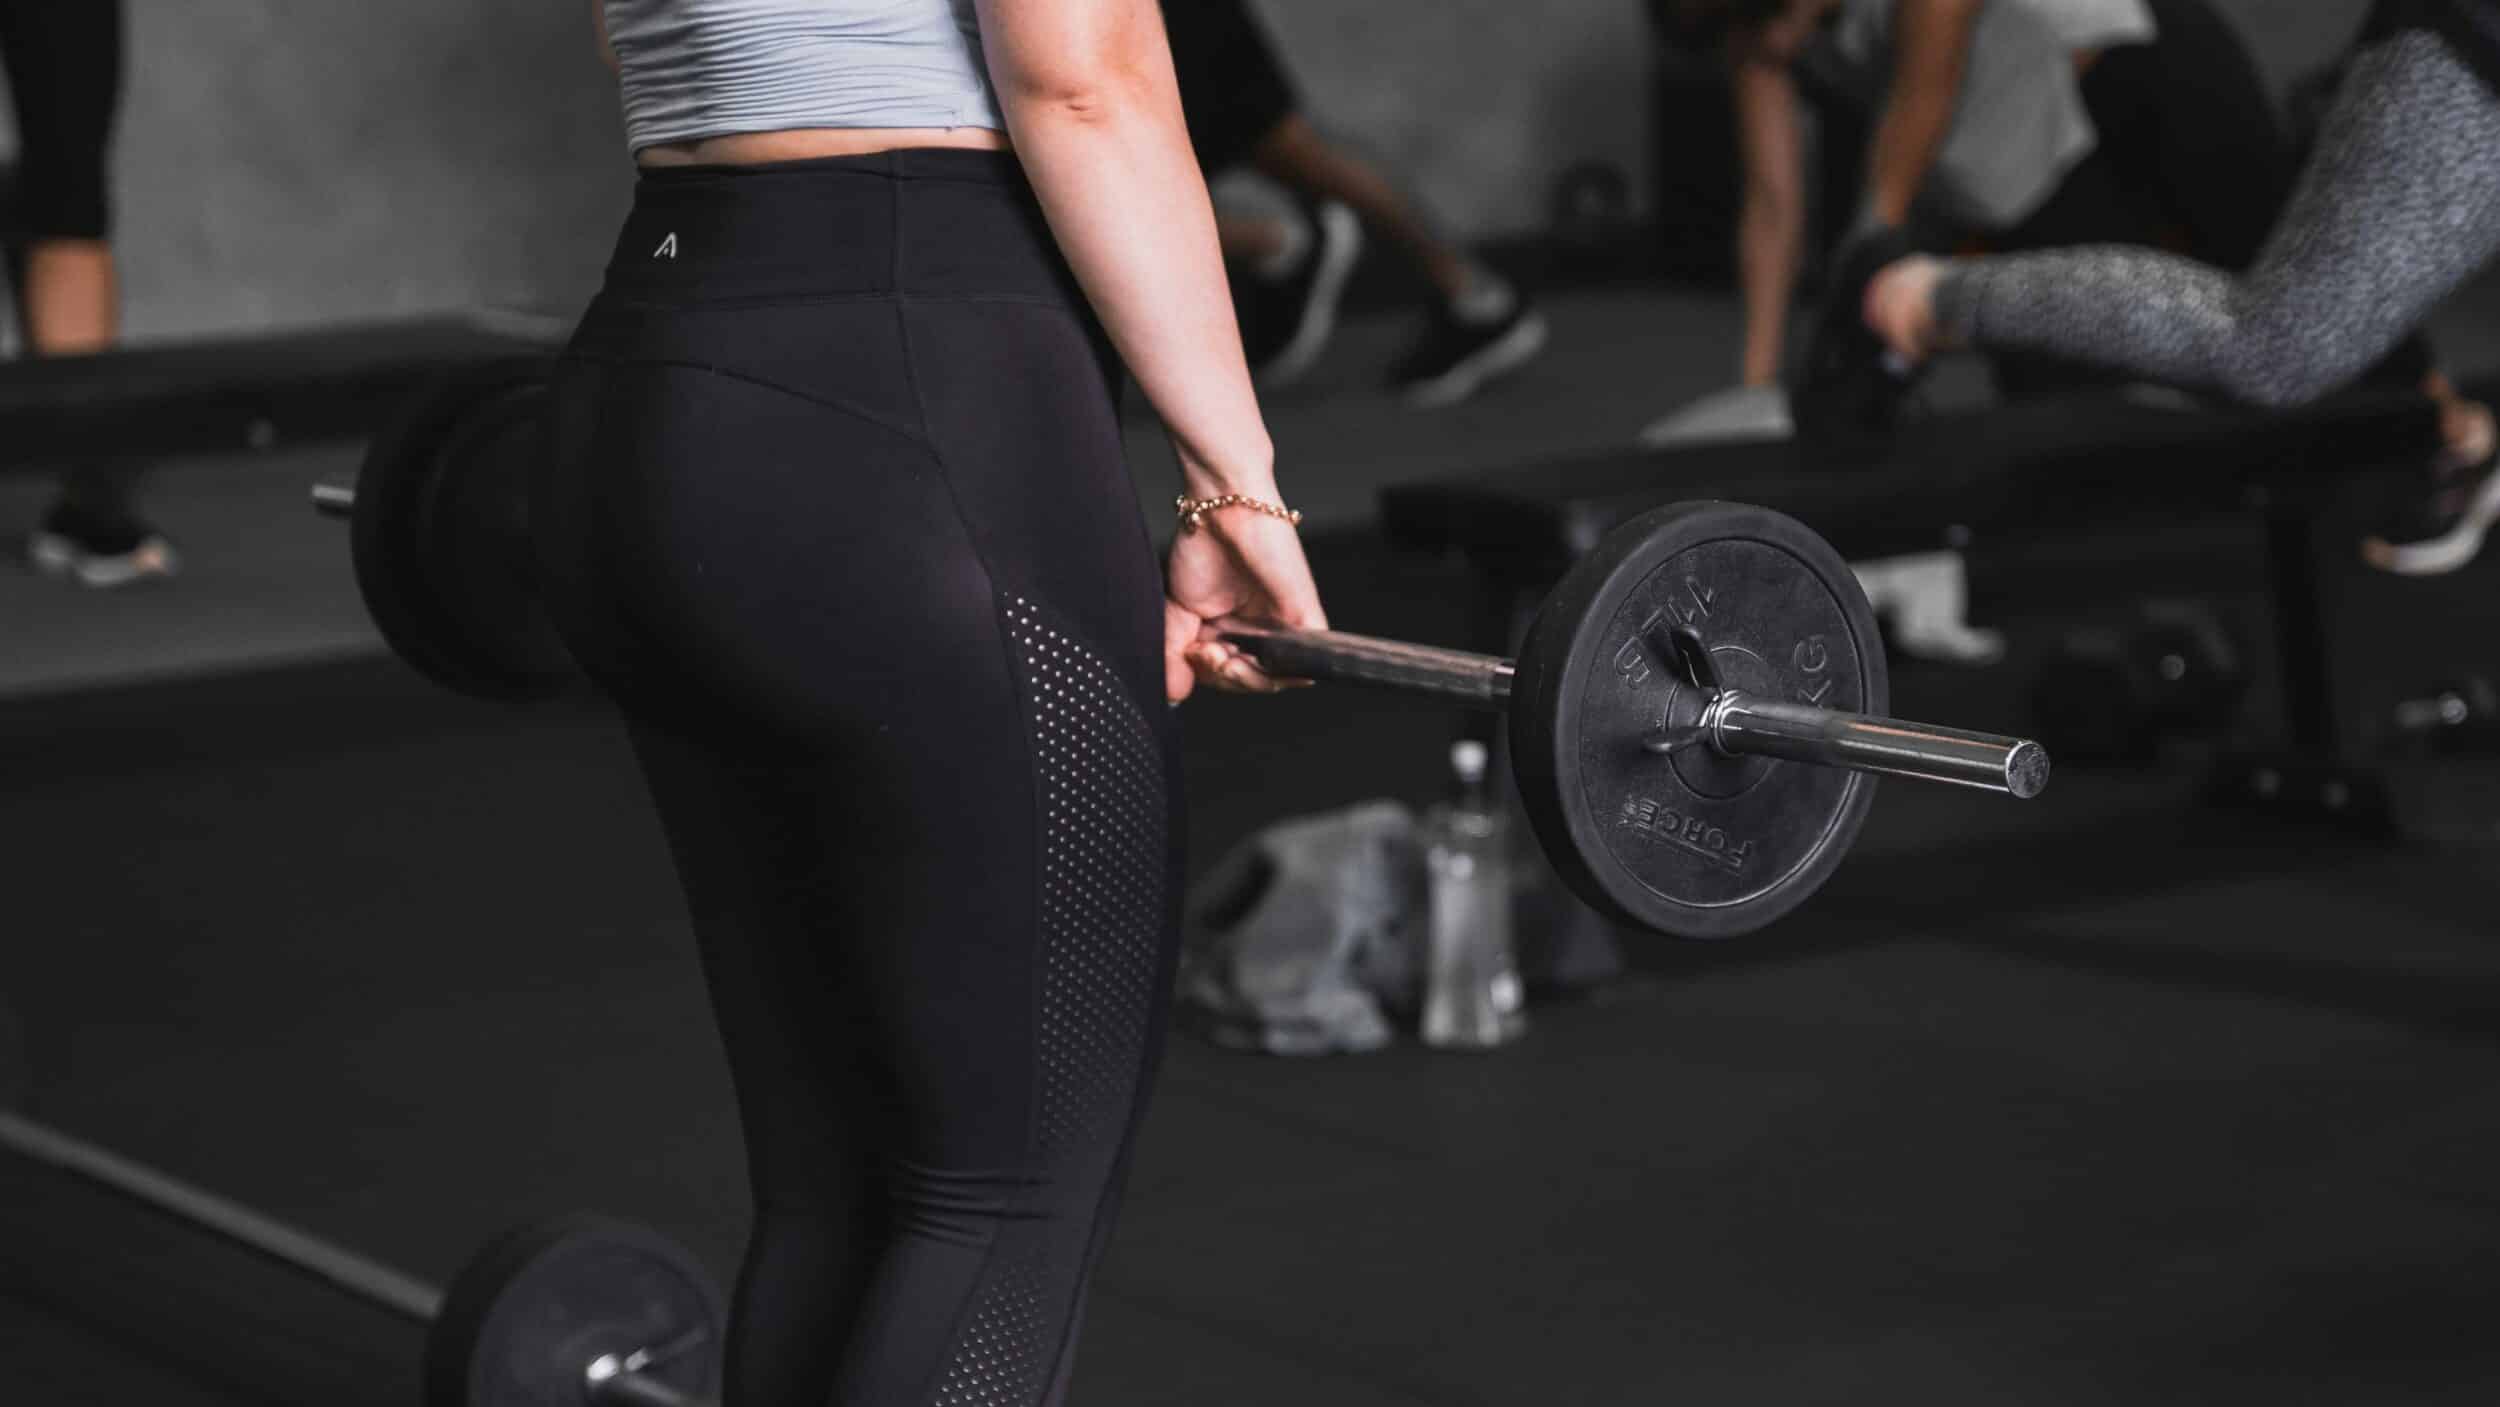


You want a strong, defined back. You know rows are essential. But barbell rows feel awkward. Your form feels uncertain. You’re not sure if you’re doing them correctly.
Here’s the problem: barbell rows are technically demanding. Poor form is common. Most gym-goers execute them badly, which reduces effectiveness and increases injury risk.
I’m Will Duru, a personal trainer with over 10 years’ experience in London. I’ve taught hundreds of women proper barbell row technique. When executed correctly, it’s one of the most effective exercises for building back strength and size. When executed poorly, it’s frustrating and potentially harmful.
This guide explains exactly how to barbell row with proper form, common mistakes women make, and how to progress safely.
Why Barbell Rows Matter
Before diving into technique, understand why this exercise is worth learning.
Builds back thickness: Barbell rows develop the mid and upper back muscles that create a strong, defined appearance. They target lats, rhomboids, traps, and rear delts simultaneously.
Improves posture: Modern life creates rounded shoulders from desk work and phone use. Rows strengthen the muscles that pull shoulders back, improving posture.
Balances pressing movements: If you bench press, overhead press, or do press-ups, you need rows. Balanced training prevents shoulder problems and muscular imbalances.
Functional strength: Pulling movements translate to real life—lifting shopping, pulling doors, carrying children. Rows build practical strength.
Progressive overload potential: You can load barbell rows heavily and track clear progression over time.
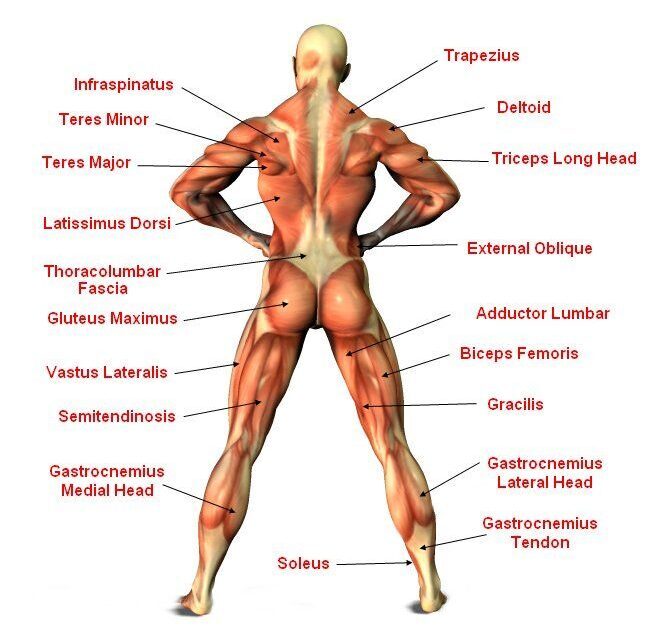
Muscles Worked
Barbell rows are a compound movement recruiting multiple muscle groups:
Primary muscles:
- Latissimus dorsi (lats): The large muscles running down your sides from armpit to lower back
- Rhomboids: Between your shoulder blades, responsible for retracting (squeezing) shoulder blades together
- Trapezius (traps): Upper and middle portions, from neck down between shoulder blades
Secondary muscles:
- Rear deltoids: Back of shoulders
- Biceps: Assist with pulling movement
- Erector spinae: Lower back muscles that maintain your hinged position
- Core: Abs and obliques stabilise your torso throughout
This extensive muscle recruitment is why rows are so effective and why proper form matters enormously.
Perfect Barbell Row Technique
Here’s step-by-step execution.
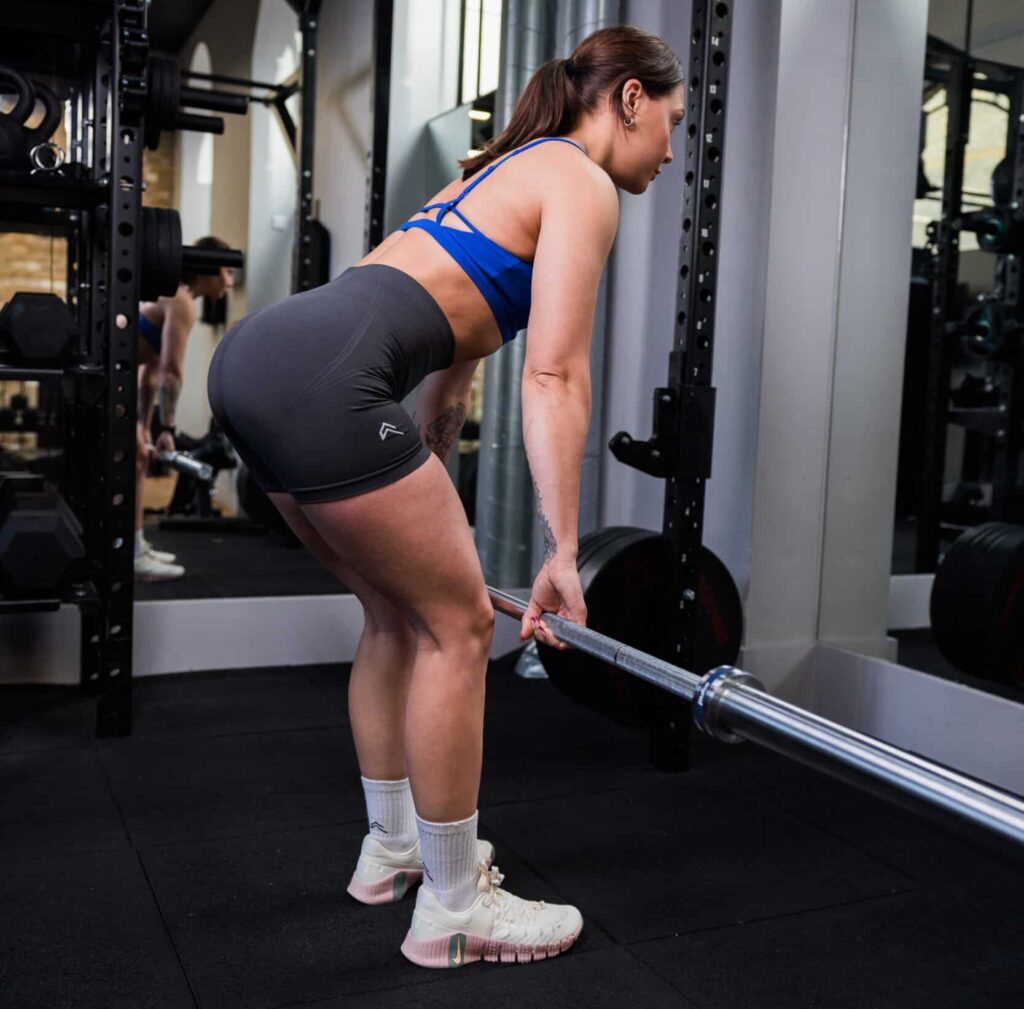
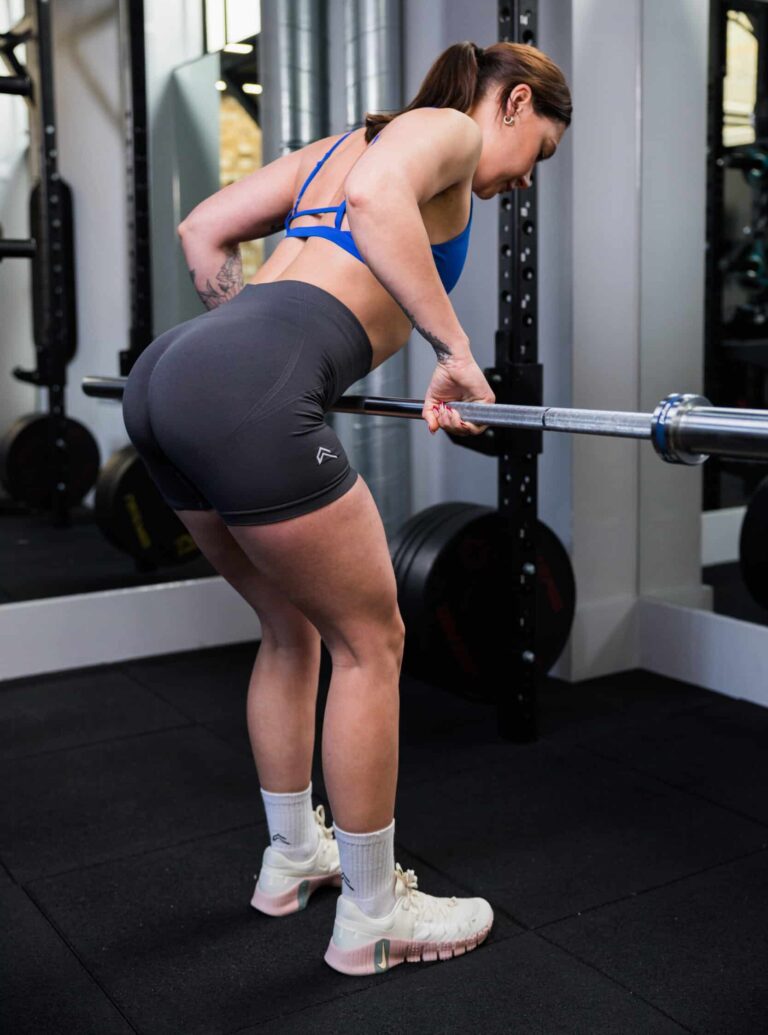
Setup
Bar position: Start with the barbell on the floor, directly over your mid-foot. If you can’t pull from the floor initially (standard plates make the bar sit low), use a rack set at mid-shin height.
Stance: Stand with feet hip-width apart, toes pointed slightly outward (about 15-30 degrees).
Grip: Use an overhand grip (palms facing you) slightly wider than shoulder-width. Wrap your thumbs around the bar. Squeeze the bar hard—this creates tension throughout your arms and back.
Hip hinge: Push your hips back whilst bending knees slightly (about 15-20 degree knee bend). Your torso should be between 45 degrees and parallel to the floor. The more horizontal your torso, the more you emphasise lats. A more upright angle (45 degrees) emphasises mid-back.
Neutral spine: Keep your back flat, not rounded or excessively arched. Your lower back should maintain its natural slight curve.
Shoulder position: Retract your shoulder blades slightly. Your shoulders should be pulled back and down, not rounded forward.
Head position: Keep your neck neutral. Look at a spot on the floor about 1-2 metres in front of you. Don’t crane your neck up to look forward.
Arm position: Arms should hang straight down from your shoulders with elbows fully extended.
You’re now in the starting position.
The Pull (Concentric Phase)
Initiate with your back, not your arms: Think about driving your elbows back toward the ceiling, not pulling with your biceps. Your arms are hooks—your back does the work.
Pull the bar to your lower chest/upper stomach: The bar should travel vertically upward in a straight line. It touches your body somewhere between your sternum and belly button, depending on your torso angle.
Lead with your elbows: Your elbows should move behind your torso as you pull. Keep them reasonably close to your body (about 45-degree angle from torso), not flared out to the sides.
Squeeze your shoulder blades together: At the top of the movement, your shoulder blades should be squeezed together hard. Imagine trying to hold a pencil between your shoulder blades.
Keep your torso stable: Your torso angle should remain constant. Don’t raise your chest more than 10-15 degrees. If you’re standing significantly more upright at the top, you’re using momentum rather than back strength.
Pause briefly at the top: Hold the contracted position for a fraction of a second, feeling your back muscles squeeze.
The Lower (Eccentric Phase)
Control the descent: Lower the bar with control, taking 1-2 seconds. Don’t just drop it.
Maintain shoulder blade retraction: Your shoulders shouldn’t collapse forward as you lower. Keep them pulled back throughout.
Full extension: Lower until your arms are fully extended, feeling a stretch in your lats.
Touch or near-touch the floor: If pulling from the floor (Pendlay row style), the bar returns to the floor on each rep. If using a rack setup, lower until arms are fully extended.
Reset if needed: If form breaks down, reset your position between reps rather than grinding through with poor technique.
That’s one complete rep. Repeat for your prescribed number of reps whilst maintaining perfect form.
Common Mistakes (And How to Fix Them)
I see the same errors repeatedly. Avoid these.
Mistake 1: Using Momentum
What it looks like: You jerk your torso upward at the start of each rep, using hip drive and momentum to lift the weight.
Why it’s wrong: You’re not building back strength. You’re using your lower back and hips to throw the weight up. This reduces effectiveness and increases lower back strain.
The fix: Reduce the weight until you can pull smoothly without jerking. Your torso angle should change by no more than 10-15 degrees during the rep.
Mistake 2: Pulling with Arms Rather Than Back
What it looks like: You’re curling the bar up with your biceps, elbows staying in front of your torso.
Why it’s wrong: Your back muscles aren’t doing the work. Your biceps fatigue whilst your back remains understimulated.
The fix: Focus on driving elbows backward, not pulling with your hands. Think about your hands as hooks—they hold the bar whilst your back pulls.
Mistake 3: Rounding Your Lower Back
What it looks like: Your lower back curves into flexion during the movement.
Why it’s wrong: This places excessive stress on spinal discs and increases injury risk significantly.
The fix: Reduce the weight. Brace your core hard before each rep. If you can’t maintain a neutral spine, you’re lifting too heavy or need to strengthen your lower back and core before progressing.
Mistake 4: Standing Too Upright
What it looks like: Your torso is nearly vertical, more than 45 degrees from horizontal.
Why it’s wrong: You’re essentially doing an upright row, which targets shoulders more than back. The exercise becomes less effective for back development.
The fix: Hinge further at your hips. Push your bottom backward, lowering your chest closer to parallel with the floor.
Mistake 5: Excessive Range of Motion
What it looks like: You pull the bar far past your torso, with elbows travelling well behind your back.
Why it’s wrong: When your upper arm passes significantly behind your midline, your shoulder joint becomes unstable. This can damage shoulder structures over time.
The fix: Stop the pull when your elbows are in line with your torso. That’s full range of motion. Going further doesn’t increase effectiveness.
Mistake 6: Flaring Elbows Out
What it looks like: Your elbows point out to the sides as you pull, creating a wide pulling angle.
Why it’s wrong: This shifts emphasis to rear delts and upper traps, away from lats. It also increases shoulder impingement risk.
The fix: Keep elbows at roughly 45 degrees from your torso. They should move backward and slightly outward, not directly out to the sides.
Mistake 7: Shoulders Collapsing Forward
What it looks like: At the bottom of the movement, your shoulders round forward and your upper back curves.
Why it’s wrong: You lose the stretch in your back muscles. Each rep starts from a weak, rounded position rather than a strong, retracted position.
The fix: Maintain slight shoulder blade retraction throughout the entire movement, even at the bottom position.

Grip Variations
You have two main grip options, each with slightly different effects.
Overhand Grip (Pronated)
How: Palms facing down toward you, thumbs wrapped around the bar.
Effect: Emphasises upper back (traps, rhomboids) and rear delts more. Reduces bicep involvement. This is the standard grip most people should use.
Best for: General back development and building thickness in mid-back.
Underhand Grip (Supinated)
How: Palms facing up away from you, thumbs wrapped around the bar.
Effect: Emphasises lower lats and increases bicep involvement.
Best for: Targeting lats specifically and building pulling strength if your biceps are strong.
Note: Underhand grip typically allows slightly heavier weights due to increased bicep recruitment.
Most women should use overhand grip as their primary rowing variation, occasionally incorporating underhand grip for variety.
Starting Weights and Progression
Week 1-2: Empty barbell (20kg) for 3 sets of 8 reps. Focus entirely on movement quality and learning the hip hinge position.
Week 3-4: If form is solid, add 2.5-5kg. Continue 3 sets of 8 reps.
Month 2-3: Progress weight by 2.5kg every 1-2 weeks as long as form remains perfect.
Realistic Progression Timeline
These are typical progression ranges for women training consistently with proper technique:
Month 1: 20-30kg for 8 reps Month 3: 30-40kg for 8 reps Month 6: 40-50kg for 8 reps Month 12: 50-60kg for 8 reps18-24 months: 60-75kg for 8 reps
Strong, experienced lifters may eventually barbell row 80kg+ for reps, but this takes years of consistent training.
Progress isn’t linear. Some weeks you’ll stall. That’s normal. Focus on long-term progression over months and years, not week to week.
Variations and Alternatives
Once you’ve mastered standard barbell rows, consider these variations.
Pendlay Rows
Difference: Bar returns to floor on each rep, starting from dead stop. Torso is parallel to floor.
Benefit: Eliminates momentum completely. Builds explosive pulling power.
When to use: For strength development or if you struggle with using momentum.
Yates Rows
Difference: More upright torso (about 45 degrees), underhand grip.
Benefit: Allows heavier weights, emphasises lower lats and biceps.
When to use: As a variation after mastering standard rows.
Dumbbell Rows
Difference: Unilateral (one arm at a time), typically done with one hand and knee on bench for support.
Benefit: Addresses left-right imbalances, doesn’t tax lower back as much.
When to use: As supplementary work or if you have lower back issues that prevent barbell rowing.
Seal Rows
Difference: Lying face-down on elevated bench, completely supported.
Benefit: Removes all lower back stress. Pure back work with zero stabilisation demands.
When to use: For high-volume back work without fatigue, or when managing lower back issues.
Troubleshooting
“My lower back fatigues before my back muscles”
Your lower back isn’t strong enough to maintain the hinged position yet. Solutions:
- Strengthen your lower back with back extensions and Romanian deadlifts
- Reduce the weight on rows
- Use a slightly more upright torso position (45 degrees rather than parallel)
- Switch temporarily to seal rows or chest-supported rows whilst building lower back strength
“I don’t feel my back working, just my arms”
You’re pulling with your biceps rather than initiating with your back. Solutions:
- Use lifting straps to remove grip limitation and focus purely on back engagement
- Reduce weight significantly
- Focus on the cue “drive elbows back” rather than “pull bar up”
- Practice the movement with extremely light weight (just the bar) until you feel your back contracting
“My grip gives out before my back is fatigued”
Weak grip is limiting your back training. Solutions:
- Use lifting straps for working sets
- Perform separate grip-strengthening work (dead hangs, farmer’s carries)
- Use chalk to improve grip
- Over time, your grip will strengthen from rowing itself
“The position feels uncomfortable/awkward”
The hip-hinge position takes time to learn. Solutions:
- Practice hip hinges with just your bodyweight or a broomstick
- Start with a more upright angle (45 degrees) and gradually work toward more horizontal as you adapt
- Film yourself to check your position matches the technique description
- Consider Romanian deadlifts to build familiarity with the hip-hinge pattern
The Bottom Line
Barbell rows are one of the most effective back exercises available. Proper execution requires attention to technique, but the payoff is substantial.
Key points:
✅ Hip hinge with neutral spine, torso 45 degrees to parallel
✅ Pull elbows back, not hands up
✅ Squeeze shoulder blades together at top
✅ Control the descent, don’t drop the weight
✅ Maintain consistent torso angle (no more than 10-15 degrees of movement)
✅ Start with 20kg (empty bar) and progress gradually
✅ Train 1-2 times weekly, 3-4 sets of 6-10 reps
Most women never master barbell rows because they use too much weight too soon, develop poor habits, and quit out of frustration.
Don’t do that. Start light. Master form. Progress systematically.
In 12-18 months of consistent training, you’ll be rowing 60-70kg+ with perfect technique, with a strong, defined back to show for it.
References
- Fenwick, C.M., Brown, S.H. and McGill, S.M. (2009). Comparison of Different Rowing Exercises: Trunk Muscle Activation and Lumbar Spine Motion, Load, and Stiffness. Journal of Strength and Conditioning Research, 23(5), pp.1408-1417.
- Andersen, V., Fimland, M.S., Brenner, A.K., Haslestad, L.R., Lundteigen, M.S., Skalleberg, K. and Saeterbakken, A.H. (2014). Muscle Activation and Strength in Squat and Bulgarian Squat on Stable and Unstable Surface. International Journal of Sports Medicine, 35(14), pp.1196-1202.
- Schoenfeld, B.J., Grgic, J., Ogborn, D. and Krieger, J.W. (2017). Strength and Hypertrophy Adaptations Between Low- vs. High-Load Resistance Training: A Systematic Review and Meta-Analysis. Journal of Strength and Conditioning Research, 31(12), pp.3508-3523.
- Saeterbakken, A.H., Andersen, V., Brudeseth, A., Lund, H. and Fimland, M.S. (2015). The Effect of Performing Bi- and Unilateral Row Exercises on Core Muscle Activation. International Journal of Sports Medicine, 36(11), pp.900-905.
- Schoenfeld, B.J. and Grgic, J. (2020). Effects of Range of Motion on Muscle Development During Resistance Training Interventions: A Systematic Review. SAGE Open Medicine, 8, pp.1-10.